This post explains how you can install Magento, at a single click through cPanel, the most accepted control panel in the hosting environment. This single click installation is made possible through the software named Softaculous. It includes 300+ software in its store, all installable at a click. Online stores has become one of the most successful business these days. People are interested in getting everything at their finger tip, and this laziness of common man has been well exploited by many internet companies worldwide. The process of doing business -both selling and buying – through internet is termed E-commerce. Day by day we see brand new shopping websites starting. There are many software available to make shopping carts, however Magento is indeed the best and favourite shopping cart software for all.
Magento is an open source ecommerce software based in PHP. It provides a strong ecommerce platform to business people. Also provides a lot of features and control for the customers to modify both look and functionality of their store. It is very rich in features and offers almost everything that a cart owner would require. It also provides great tools to take care of your marketing, search engine optimization and catalogue management requirements. This is not something that every vendor does. The greatest advantage of Magento is its scalability, which makes it popular among small and big stores. This tutorial is compatible with every Copahost cheap web hosting plan.
Install Magento through cPanel using Softaculous
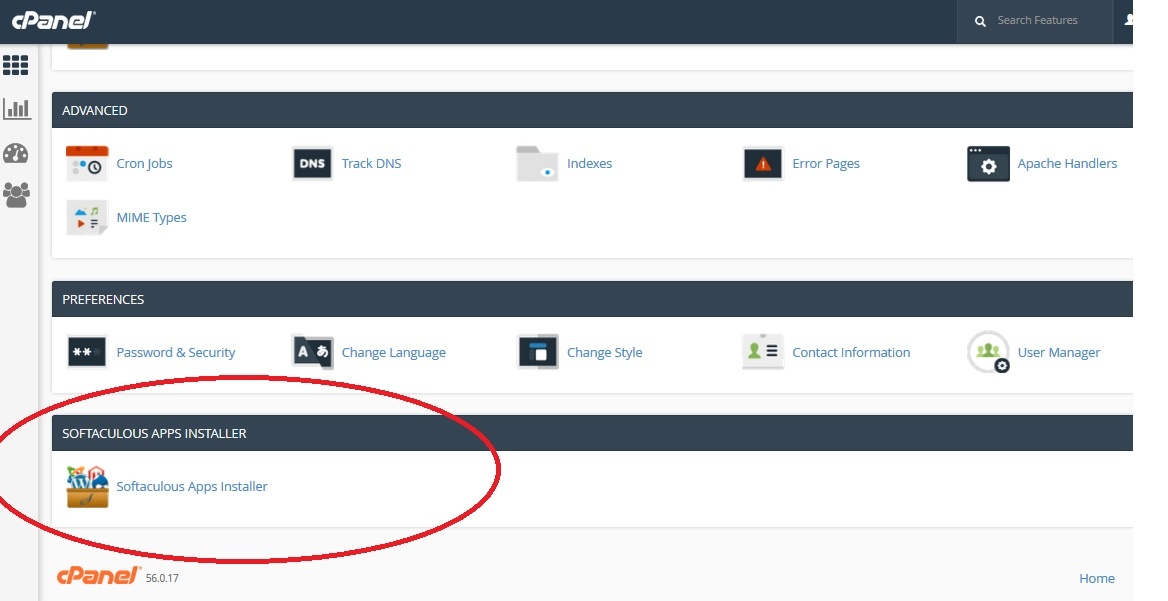
In order to install Magento, you first need to login to your cPanel using your login details. Scroll down to the bottom of the screen where you will see Softaculous App Installer. Click on it to take it to the softaculous interface.
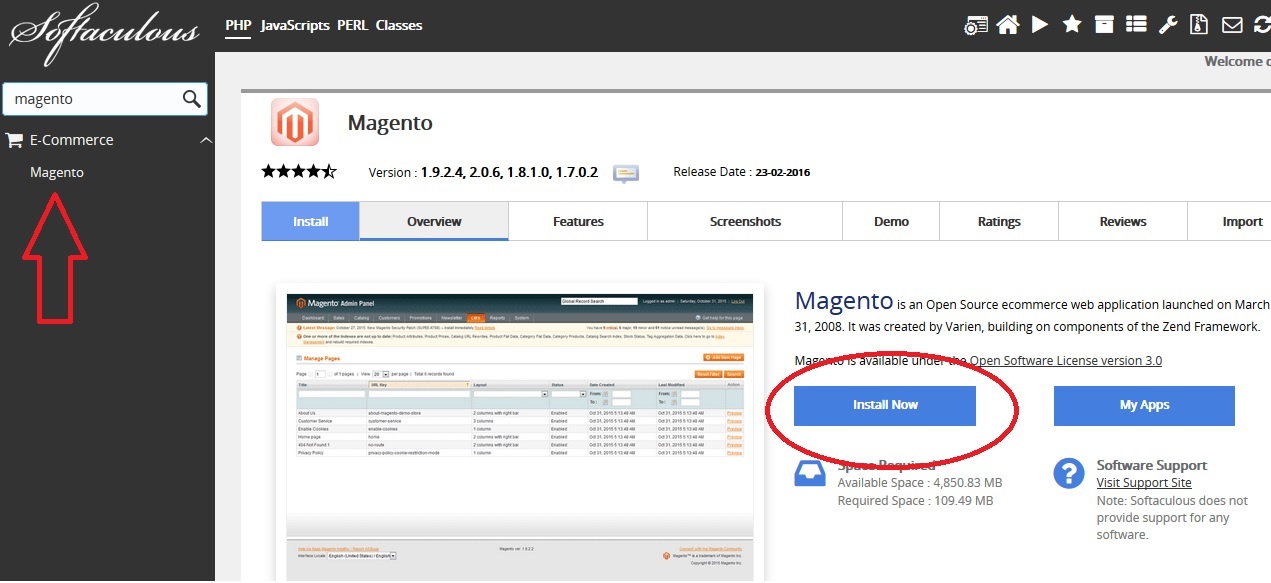
You can choose magento from the Ecommerce section of softaculous. You can also just search magento at the top search bar and click on the Install Now button.
Now you will be taken to a screen which will ask a few details from you, entering which your application will be installed. You need to answer the following.
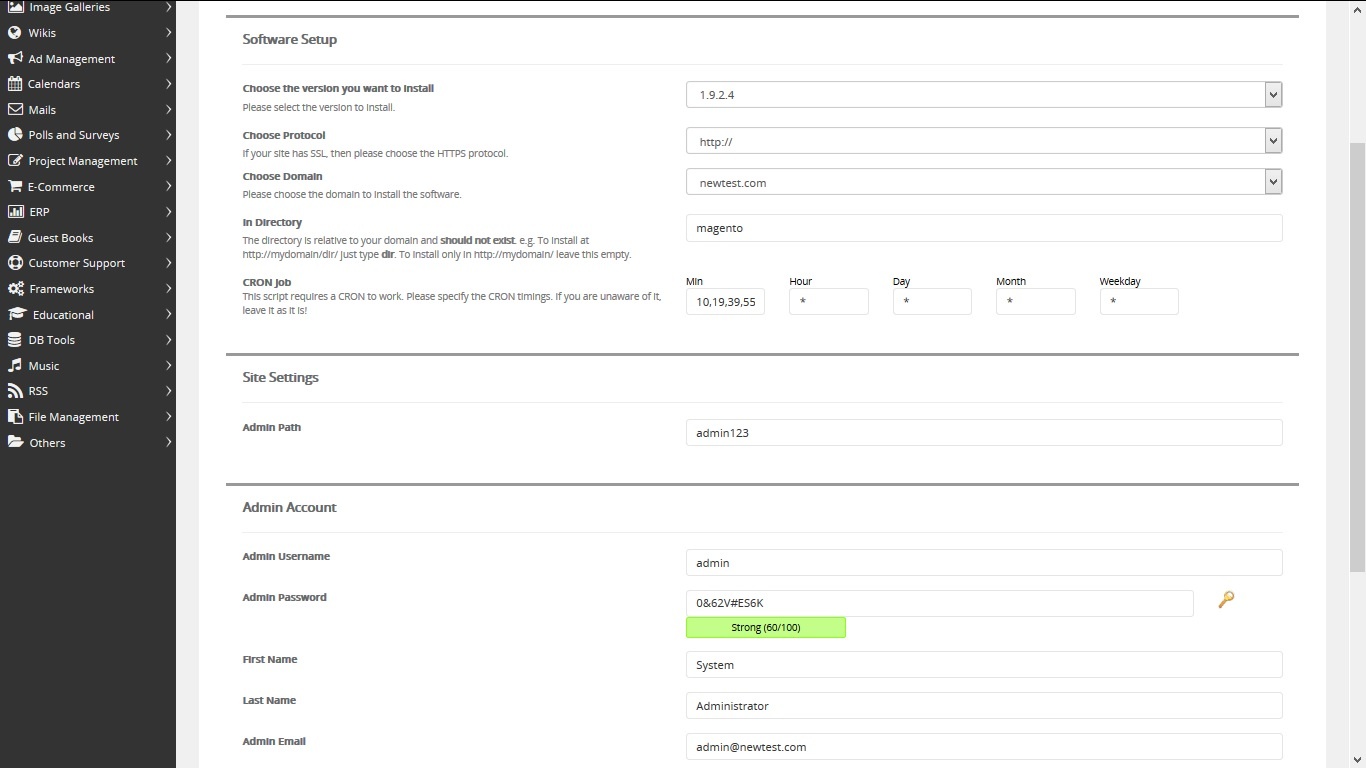
Choose the version you want to install - Unlike other software in softaculous, magento
offers the flexibility to choose the version of software you would like to install.
However, before choosing the latest version you need to make sure that your server
software like PHP version etc meets the magento requirements. For version 2 of magento,
you will need PHP 5.5

Choose Protocol - Depending on whether you would like to access the store securely or
normally, you can choose between https and http. If you want secure access, go for https
 and make sure to install SSL.

Choose Domain - The domain name under which you need to install magento

In Directory - The directory name under your domain where you need magento installed.
If you need it under your root domain, like http://newtest.com, then do not enter
anything in the text box, leave it blank. If you need it installed in a folder named
magento, enter 'magento' in the text box. There is no need to create the folder, the
installation will create it automatically

CRON Job - It is when you want the software to run scheduled tasks. Since we are in the
beginning stage, it is recommended to leave it by default and modify only later.

Admin Path - The folder where you would like the admin interface of magento to reside.
You can choose any name here.

Admin Username and Password - Choose any username of your wish, but for password make
sure you generate a very strong password by clicking on the key icon to the right of
the password field.

First Name, Last Name, Admin Email - Name and email address of the administrator.
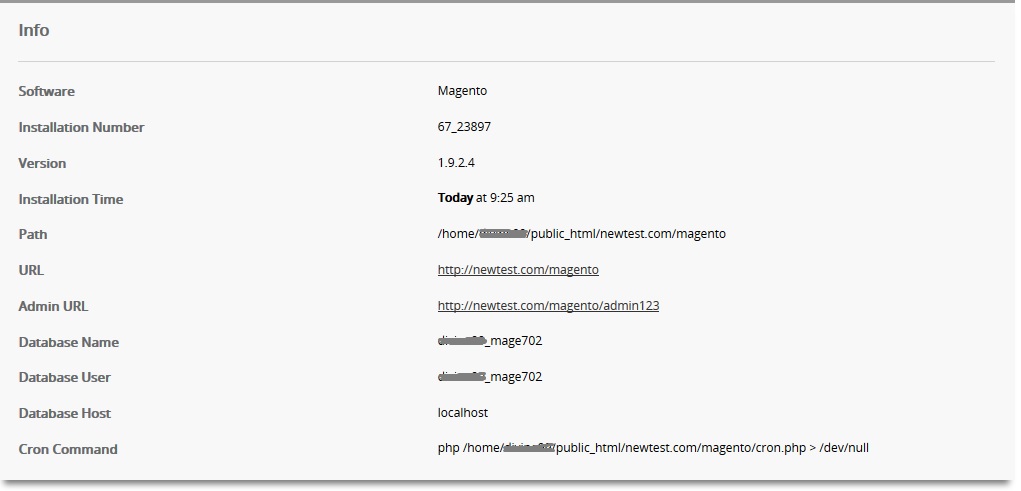
For our example, I am going to install version 1.9 of magento under http://newtest.com/magento. I need the admin folder under admin123, and my admin username is admin and password is strong one generated by the key. My installation interface looks as follows.
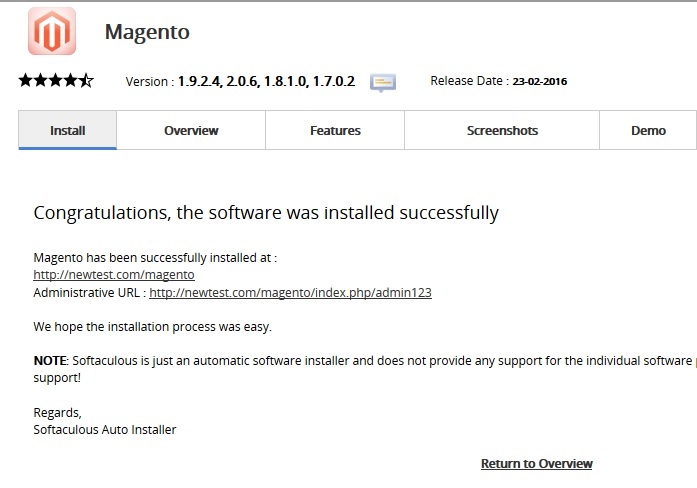
Once you have confirmed the details, click on the ‘Install’ button at the bottom of the page. Based on your server load, it will take a minute or two to complete the installation. All required features including database will be created automatically during the installation. When the installation finishes, you will receive a confirmation message as follows.
Now you can return to the overview section and your recent installation will be listed there. Click on the pencil icon to the right of it and you will be able to edit any installation details, if required. Scroll down to the bottom of that page, and a small dialog box with information on the installation will be displayed.
You can now access your shopping cart and also login to the admin area and make changes to build the cart.
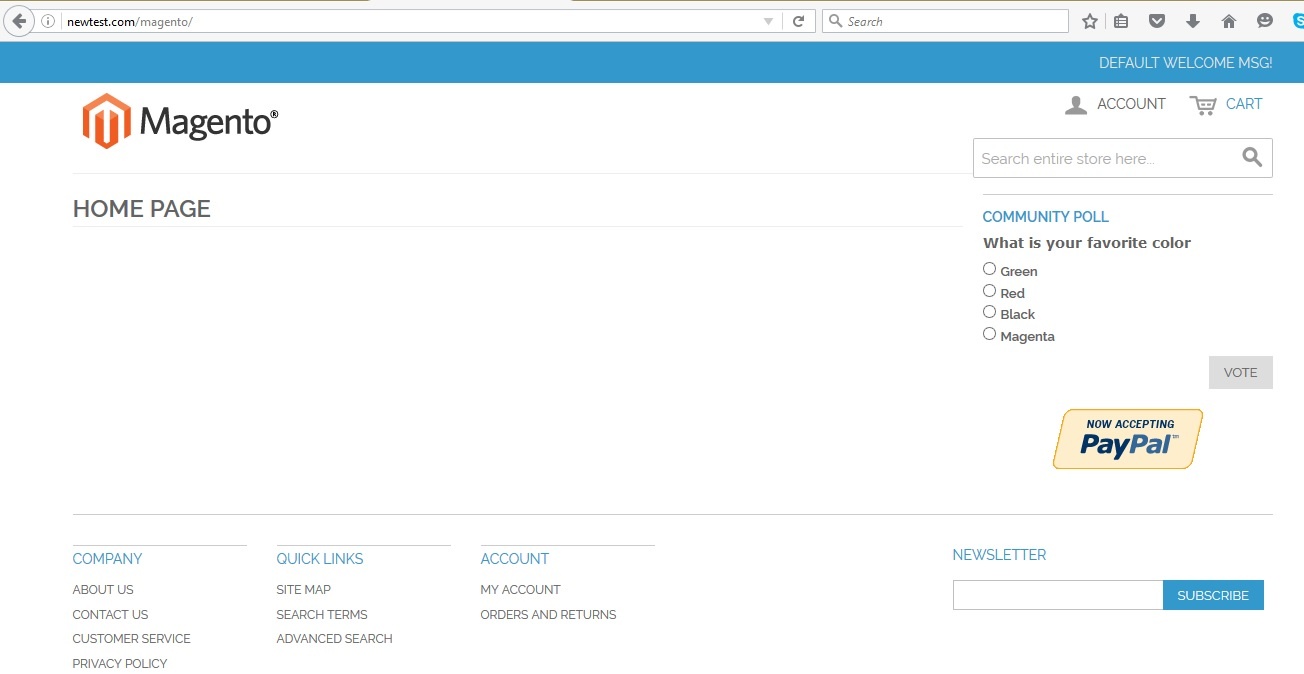
The following is how the default store appears to me after installation. The magento installed from softaculous does not contain any sample data, hence it looks plain.
We have successfully completed the installation of magento. The post covered how to install Magento through cPanel using softaculous. The magento admin interface has a lot of options to configure the store which will be explained in detail in another post.
You can read this magento tutorial about how to perform the initial configuration and start selling online.
