When you sign up for a website with any host, you might have noticed that their plan allows you to create multiple domains. You will own a single account, and the domains, no matter how many, will all reside under the same account and utilize the resources associated to a that single account. In cPanel, such domains are addon domains and parked domains. This post describes in detail what exactly do these domains stand for, and how they can be created through cPanel.
cPanel, undoubtedly, is the favourite hosting control panel for most people. cPanel allows the creation of extra domains in two ways. This article includes two topics:
cPanel Addon Domains
This option lets you create a second domain name, which is independent rather than the original domain you signed up for. The content of this website will be fetched from a subfolder of the main domain. Suppose your main domain is abc.com and your website files resides in /home/abc/public_html. You want to create another domain xyz.com, and want to display it as a different website with different contents. You can do this by creating an addon domain xyz.com, whose data will reside in /home/abc/public_html/xyz/
Thus you are able to create two independent domains, but all content will reside under the same account /home/abc , but in different folders. In short, an addon domain is a domain which belongs to a subdomain.
Creating an addon domain
Now let us see how to create an addon domain through cPanel interface.
First, login to your cPanel interface using the login details provided by your host. Once, in the dashboard, go to Domains -> Addon Domains.
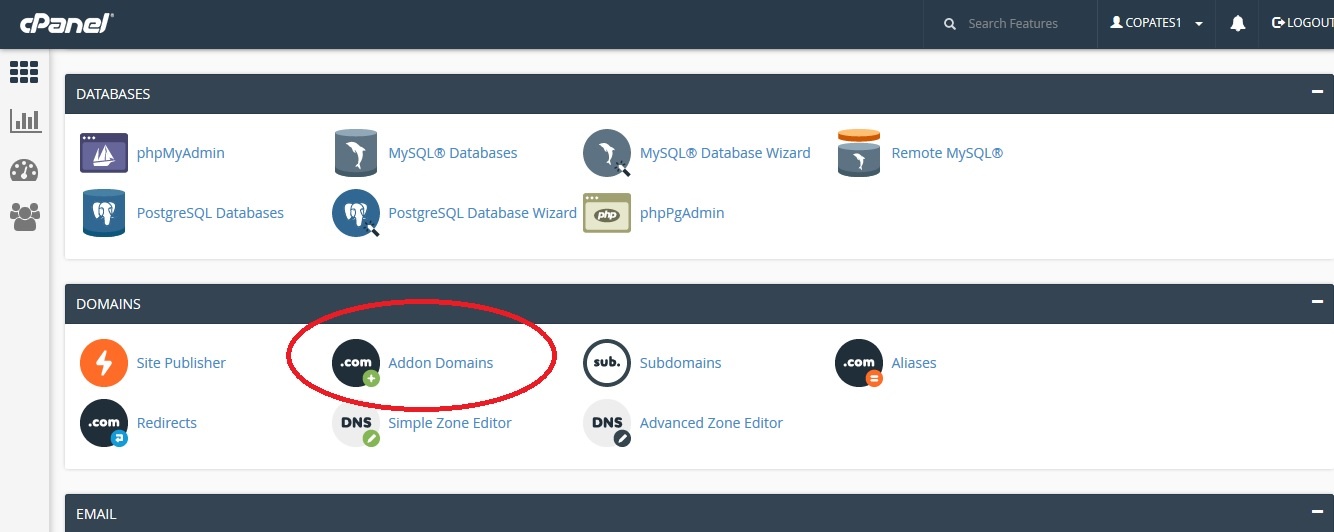
Click on Addon Domains, which will take you to the domain creation page. You have now to enter the following details.
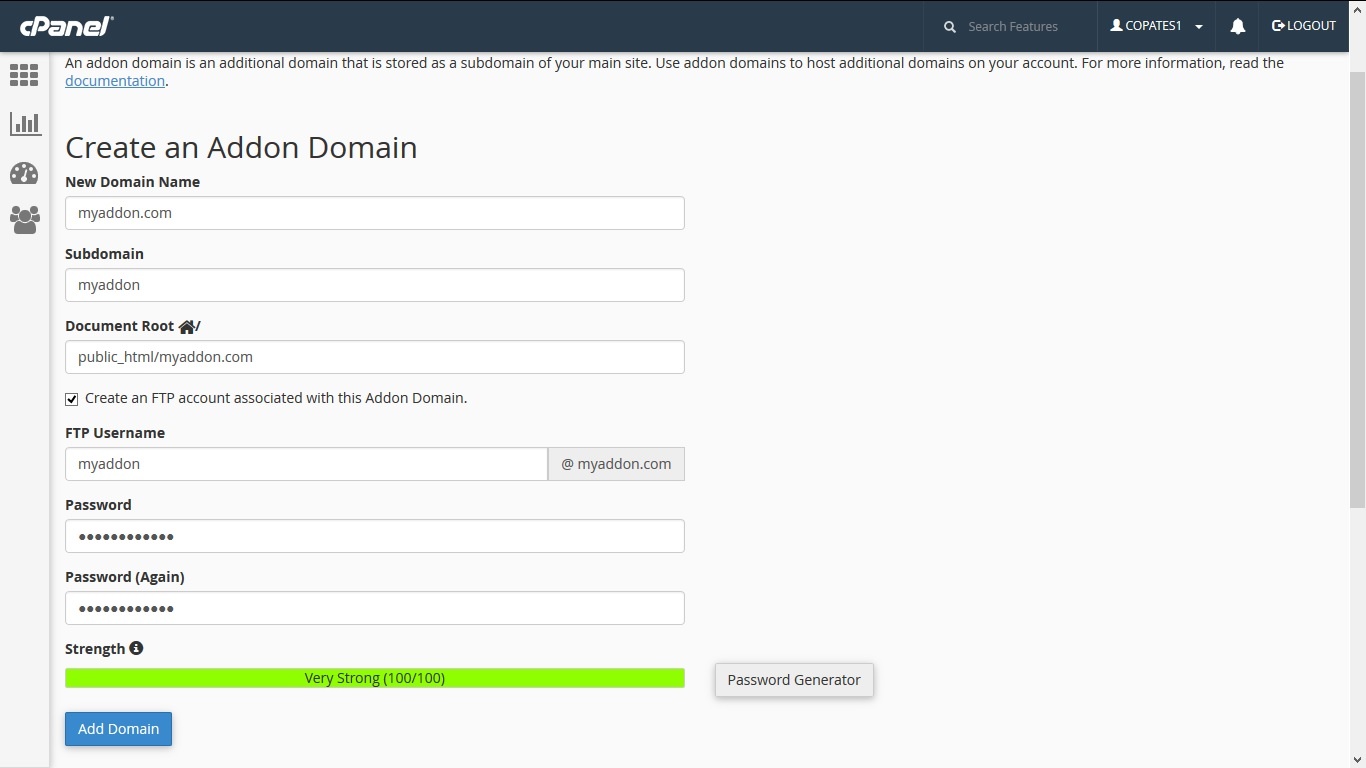
New Domain Name – This is the domain name that you want to add
Subdomain – cPanel will fill automatically this field. As mentioned earlier, an addon domain sits on top of a subdomain. So whenever you create an addon domain, a subdomain is automatically created.
Document Root – This field also will be automatically populated. Basically, it will create a subfolder under your public_html folder with the addon domain name.
Under this, you will see an option “Create an FTP account associated with this Addon Domain” (Unchecked by default). You would be able to use the main domain’s FTP account for addon domain as well. However, if you want to hire a separate developer for this addon domain, and want to give him access to this addon domain alone, then you would require an FTP account for it. In that case, you can create one by checking the option mentioned above. It will ask you to enter the following details.
FTP Username – Enter the username that you wish to create
Password – Enter a strong password for the FTP user. Recommended using the password generator provided by cPanel.
The entire screen would look as follows. I am creating an addon domain by name ‘myaddon.com’.
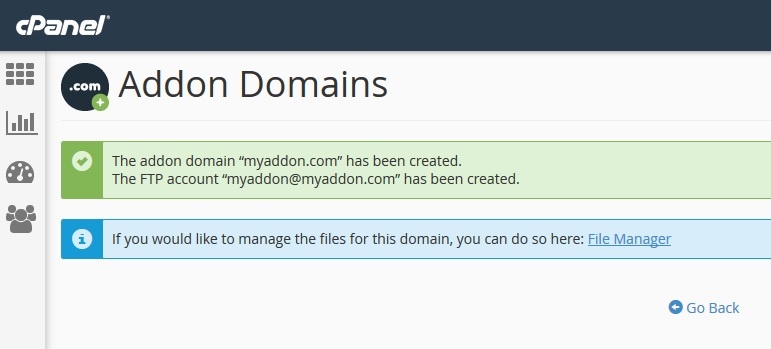
Once all the required details are filled in, just click ‘Add Domain’. You will receive a confirmation as shown below. If the domain creation fails, the exact error message will be displayed instead.
cPanel Parked Domains (Aliases domains)
A Parked Domain is a domain which will have a different name from the main domain but will display the same contents as that of the main domain. For example, if your main domain name is abc.com and you want to create another domain named xyz.com with same contents, then you can easily do so by creating an Alias (formerly known as Parked Domain) through cPanel. This relieves you from the headache of creating another domain and uploading all contents again. The browser bar will display xyz.com and automatically display the contents of abc.com. When you create a parked domain, no other folders or logins or anything extra is created (as it happens in the addon domains). It is same as the main domain itself and shares everything with the main domain, the only difference being in the domain name.
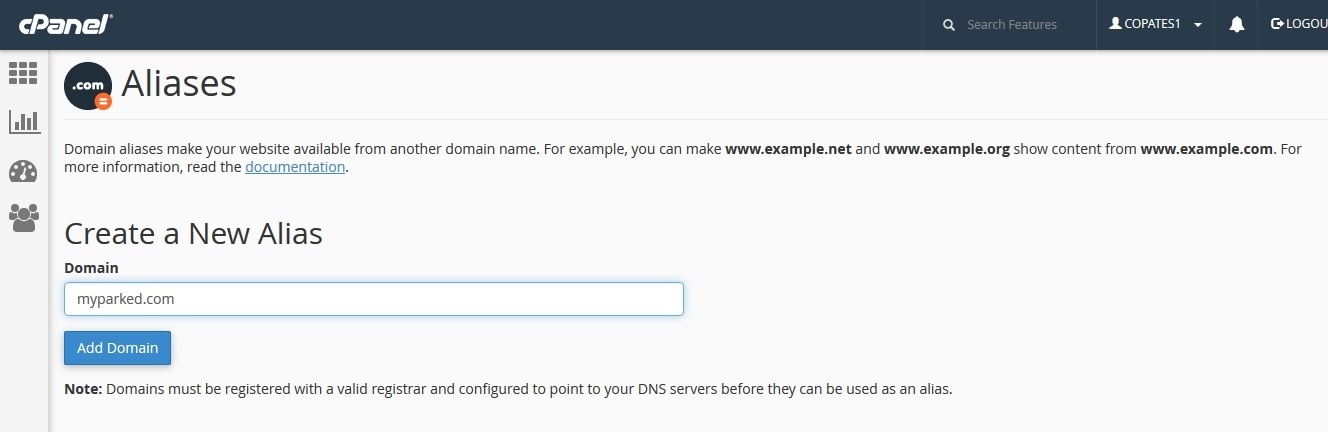
Let us now see how a Domain Alias or a Parked Domain can be created through cPanel. Login to your cPanel account and go to Domains -> Aliases
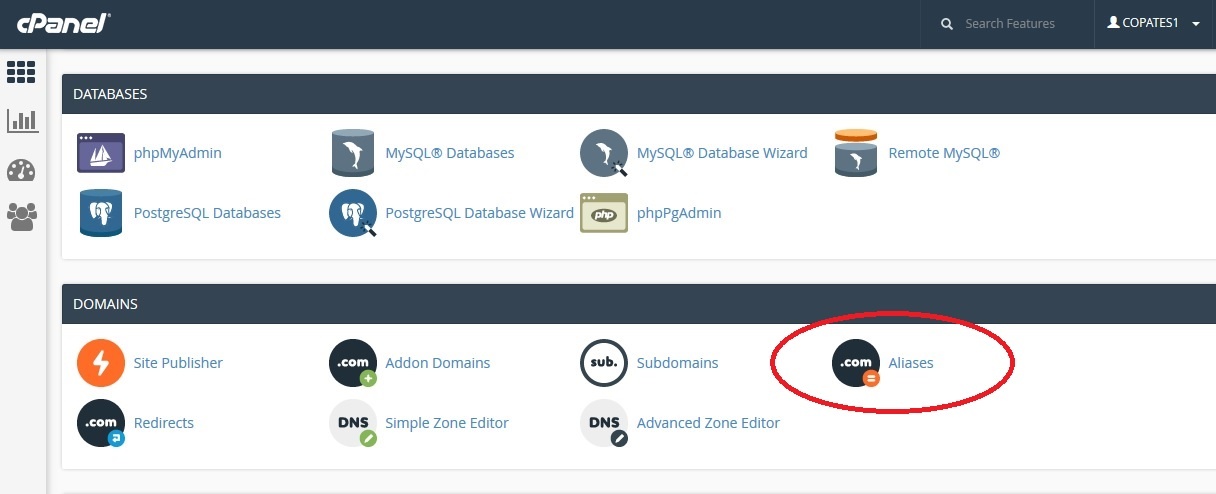
Click on Aliases which will take you to the domain creation page. The process is simple, just enter the new domain name that you wish to create and click ‘Add Domain’.
Once you create the Alias successfully, you will receive a confirmation message as follows. If there were any errors, the exact error message will be displayed.

Once you created a new domain, whether it be an addon or parked, you will have to edit the DNS of the domain to point to the new IP Address. We can do it at the registrar and most hosting companies also provide this option.
