In this article, we will explain how to create cPanel reseller hosting accounts, under WHM. This works either for cheap linux reseller hosting plans, cheap vps or cheap dedicated servers with cPanel.
For example, cPanel Hosting Companies can have either a dedicated server with cPanel, or a reseller hosting.
Access WHM to start creating the cpanel reseller hosting account
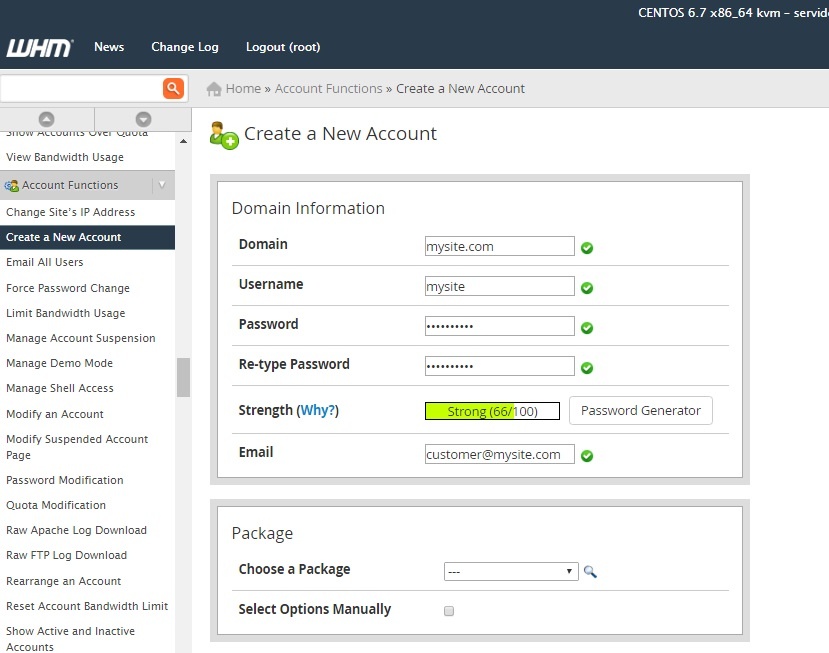
First of all, you need to acess WHM at http://your-ip-address:2086
Afterwards, click in Create a New Account, on the left menu. This option is located under Account Functions tab.
In this step, you must inform the details of the cpanel reseller hosting account you wish to create, such as Domain name, Username, Password and Email. Please note that the username and password will be used by the customer with FTP to transfer files and to access its cPanel.
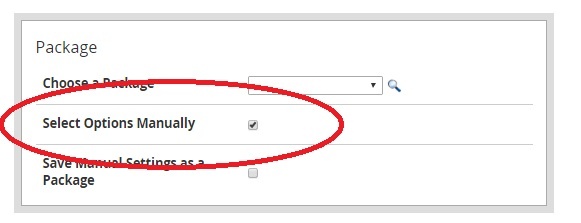
In this step, you must configure the reseller package you wish. If you don’t have any pre-created packages, you should activate the option Select Options Manually.
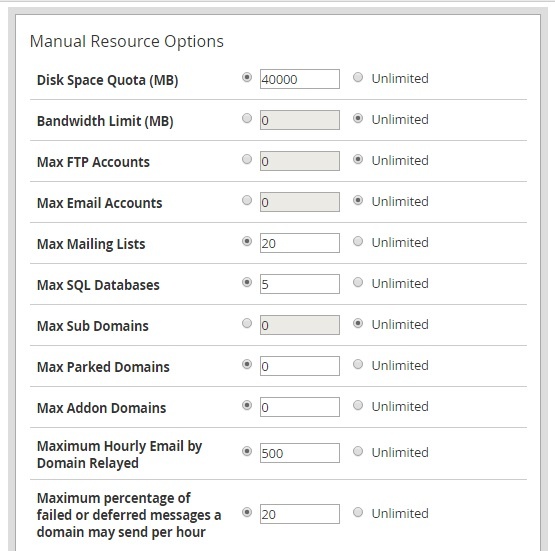
Now in Manual Resource Options, you will configure the quota (disk space), bandwidth, FTP, databases and email details.
You can feel free to configure it according to your needs.
In the next screen, we provided our recommended configuration, for an account with 40GB of disk space, 20 mailing lists, 5 SQL databases and a hourly email limitation of 500, which is good to avoid spam problems:
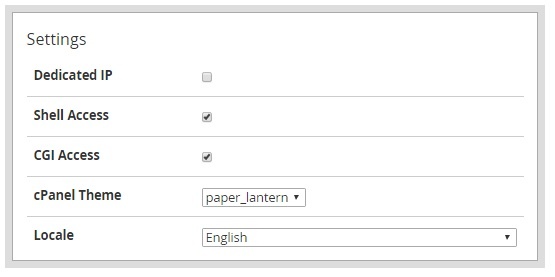
In this area, Settings, we have some options.
Dedicated IP – Delegates an exclusive IP address to this customer. To use this option, you have to make sure your web hosting provider dellegated dedicated IPs for you.
Shell Access – Allows the customer to access the linux server using SSH
CGI Access – The cgi-bin folder, should be enabled.
cPanel Theme – You can choose between paper_lantern, which is the newer theme, or x3, which is the old and traditional cpanel theme.
Locale – The desired control panel language.
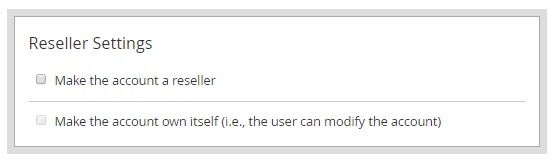
In Reseller Settings, we can set this account as a Reseller hosting account. If we activate this option, the created customer hosting account will be able to access WHM ( http://your-server-ip:2086 ) , and create sub-accounts.
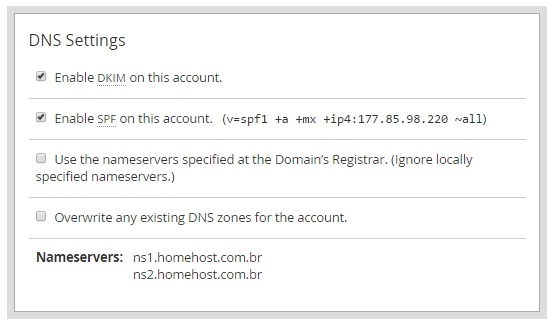
In DNS Settings, we recommend activating Enable DKIM on this account , and also, Enable SPF on this account. These two options will improve the delivery of emails, and help you to avoid the sent emails as marked as junk (spam folders).
Important: You must take note of the nameservers listed in this screen. You will have to configure them for the domain you are creating the account for, inside the domain registrar.
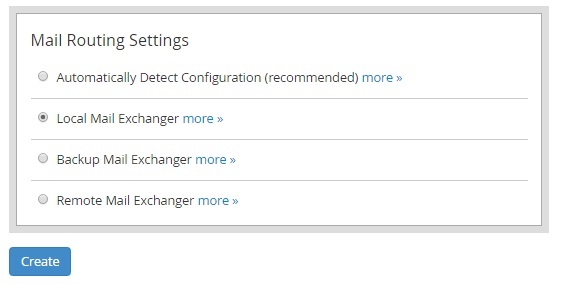
In this area, Mail Routing Settings, we can configure how the MX (Mail Exchanger) will work. By default, we should keep it as Local Mail Exchanger, so that our cPanel server will handle all the emails.
For advanced users, it’s possible to use Remote Mail Exchanger if you wish to use Google Apps, or any remote MX service.
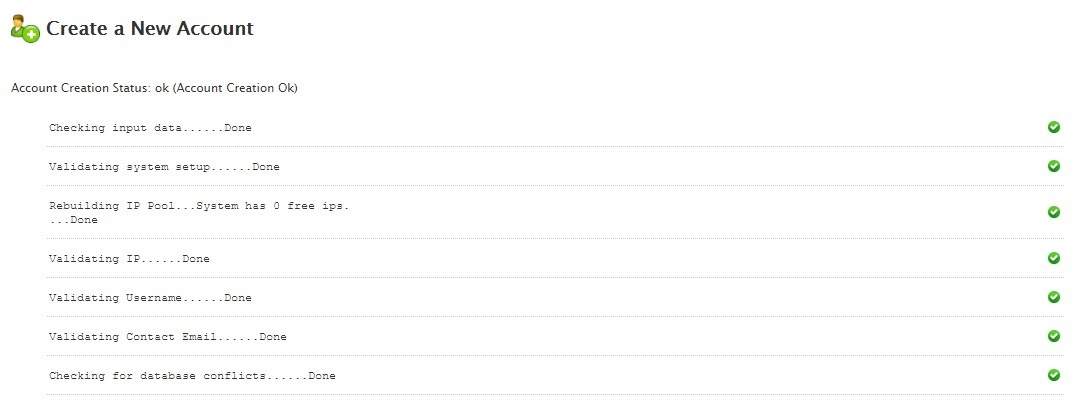
After all, we must click Create .
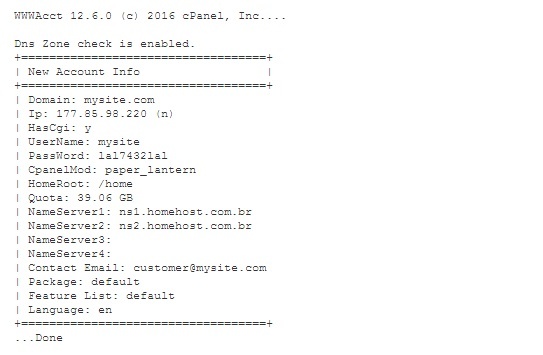
The hosting account is now created! Now take note of the login info.
After the account being created in the hosting server, you wil see this screen.
You must scroll down a little, and you will see all the created account details.
It’s very important to take note of all these information, in order to use it in your FTP client to transfer files.
The created account will be able to access cPanel, by using the URL http://your-server-ip:2082 , and the login and password just created.
Also, the NameServer1 and NameServer2 must be configured in your domain registrar, so that the created account can work properly.
The complete cPanel documentation can be found here: https://documentation.cpanel.net/
