This article shows the entire process to create an email account in cPanel, manage this account, acess the webmail, and configure your email client. This article was based in a Copahost cheap web hosting server.
First of all, you must access your cpanel at http://yoursite.com:2082 (Don’t forget to replace yoursire.com with your site’s domain name)
Table of Contents
First steps to create an email account in cPanel
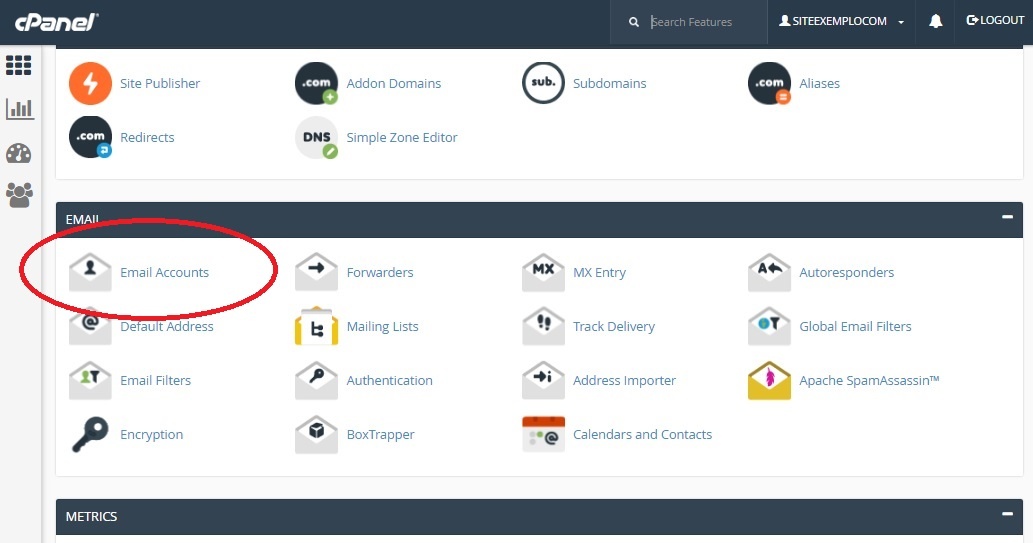
Just click in the option Email Accounts, which is located right under the tab Email.
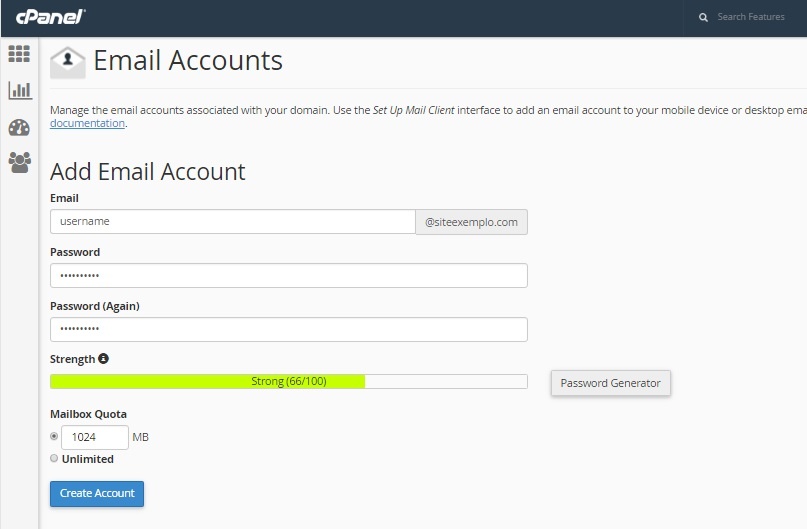
Now in this screen, you have to choose the username and password of your email account.
In Mailbox Quota, you will choose the disk space limit for this email. We advise to create email accounts in cPanel using a high quota size, or else, with unlimited quota. This will prevent you from running our of space and losing email messages.
After that, click Create Account
Acessing your webmail
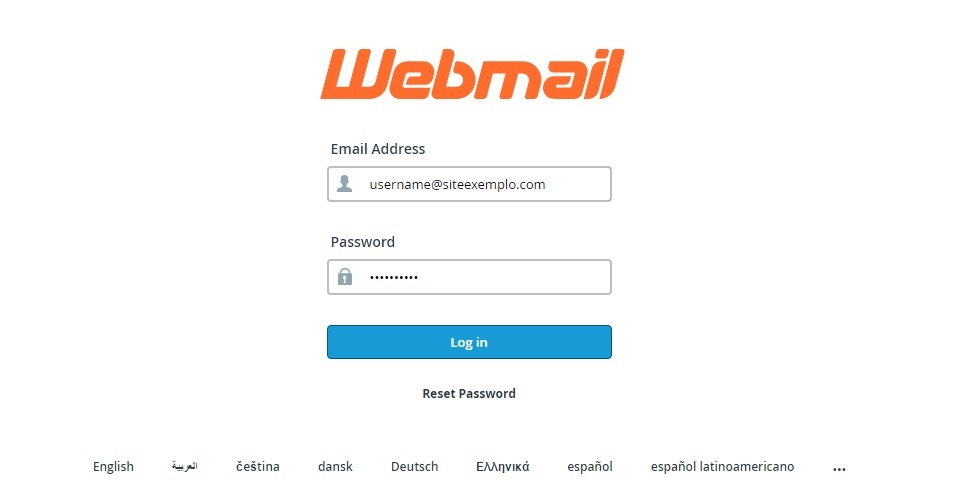
After creating your email, you can now open your webmail at: http://yoursite.com/webmail
You must enter the email and the password just configured.
Using a custom email client
To use your created email with a custom email client, such as Windows Live Mail, Outlook, etc.. You must take note of these details:
IMAP Server address: [server hostname]
IMAP port with SSL: 993 (Preferred)
POP3 port with SSL: 995
SMTP Outgoing server: [server hostname]
SMTP port with STARTTLS: 587 (for Apple devices, always use STARTTLS)
SMTP port with SSL: 465
Login – exactly the email you created. In this example, the login is [email protected]
Password – the same password created
Note: you can obtain your server hostname in your web hosting control panel.
Managing and changing the created email accounts in cPanel
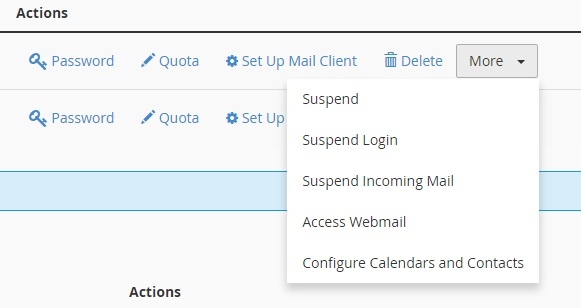
In cPanel, inside the Email Accounts option, we can also manage the emails.
Some common options:
Password – To change the email account password
Quota – Change the disk space limit of the account
Set Up Mail Client – Automated scripts to configure your email client
Delete – Removes the email account
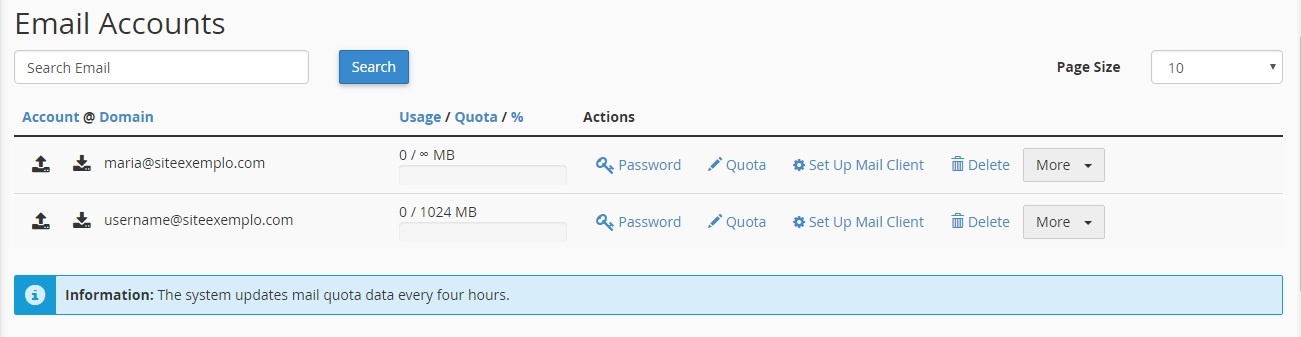
By clicking in the More box, you will have some aditional options to manage your email accounts, such as Suspend and Suspend Login , which will block temporarily the user email, Suspend Incoming Mail, that will deny new emails from being received . Access Webmail, which will lead you directly to the user webmail. And Configure Calendars and Contacts.
Vídeo showing the entire process to create your email account in cPanel
Disable an email account in cPanel
Disabling an email account in cPanel allows users to deactivate a specific email address associated with their domain without deleting the account entirely. This means that the email account will no longer receive or send messages, which can be useful for managing accounts that are no longer in use or for security reasons.
To disable an email account in cPanel, users typically navigate to the “Email Accounts” section in cPanel, locate the account they wish to disable, and select the option to disable or suspend it. This process retains the account’s settings and data, making it easy to reactivate the account in the future if necessary, while also preventing any unauthorized access or email delivery during the suspension period.
