We covered how to install Magento through cPanel in the previous post. In this magento tutorial we will discuss about how to login to the admin backend of Magento, and perform the initial steps on Basic Magento Configuration.
Article topics:
Logging in as admin
Configuring account settings
General configuration
Web configuration
Design configuration
Currency setup
Store email address
Contacts
Content management
Logging in as admin
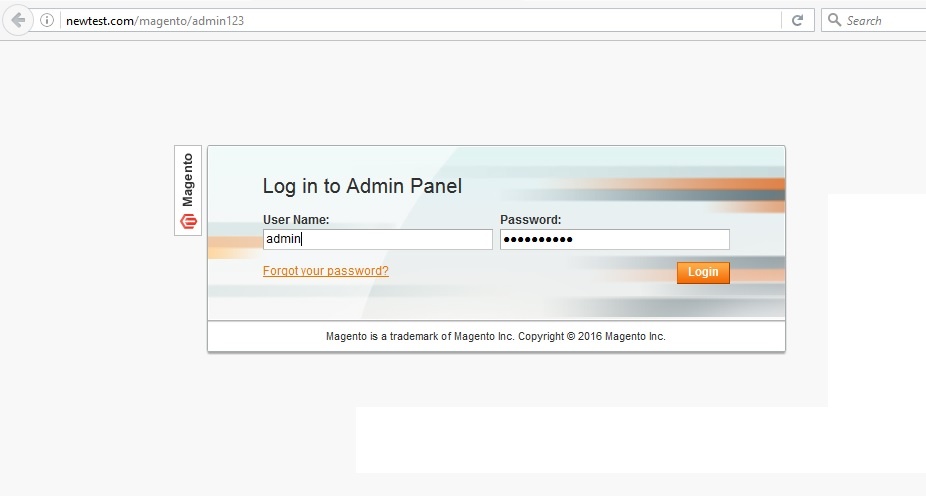
In last post, we installed Magento at http://newtest.com/magento
The admin backend was created at http://newtest.com/magento/admin123
Now login to the admin interface using the username and password you had provided during installation.
Click ‘Login’ to enter into Magento Dashboard. It provides several customization options.
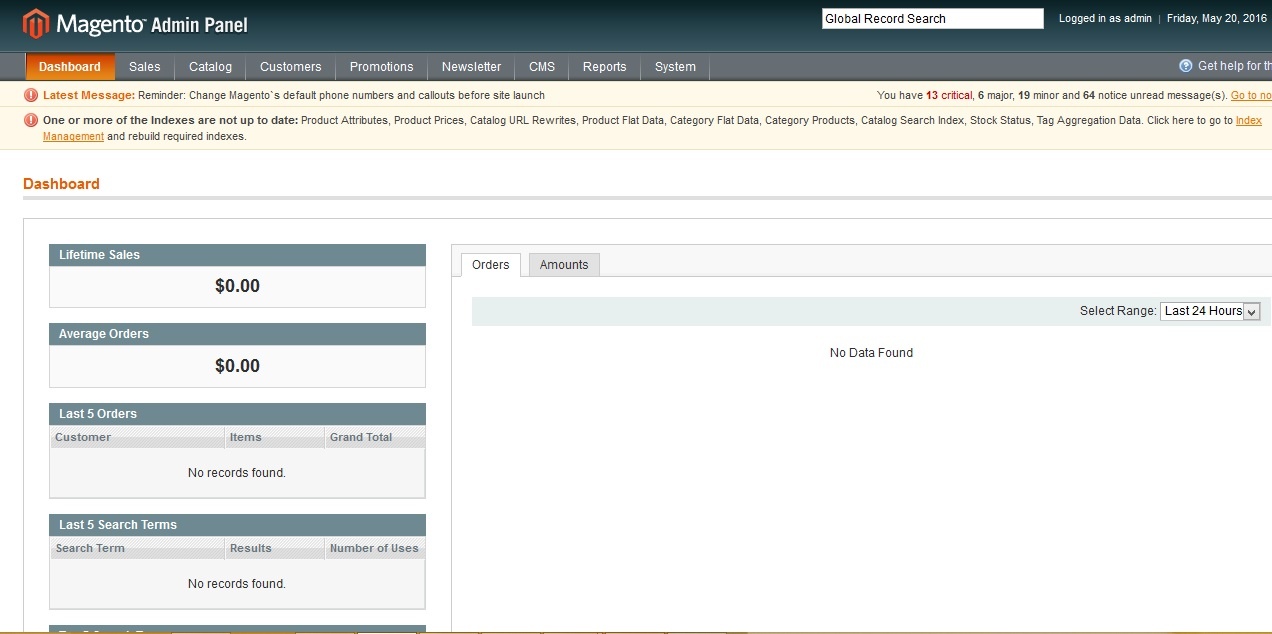
What seen above is how the magento dashboard looks like, after a fresh install of magento. Let us start with the admin account itself.
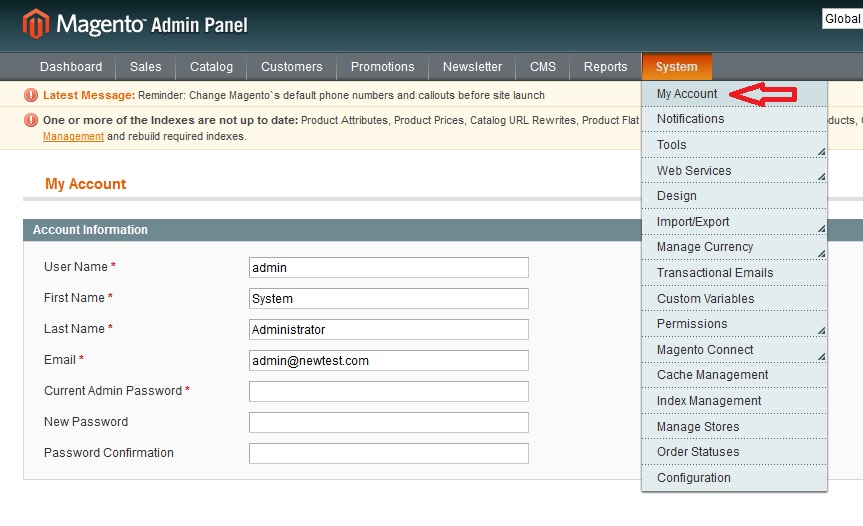
Account Settings
If you want to make any modifications to your admin account, from what was installed, you can change it at System -> Account.
You can change the username, email address, name and password if required.
Magento tutorial: General Configuration
Go to System -> Configuration and you will see a lot of options to configure. We will start with General Configuration.
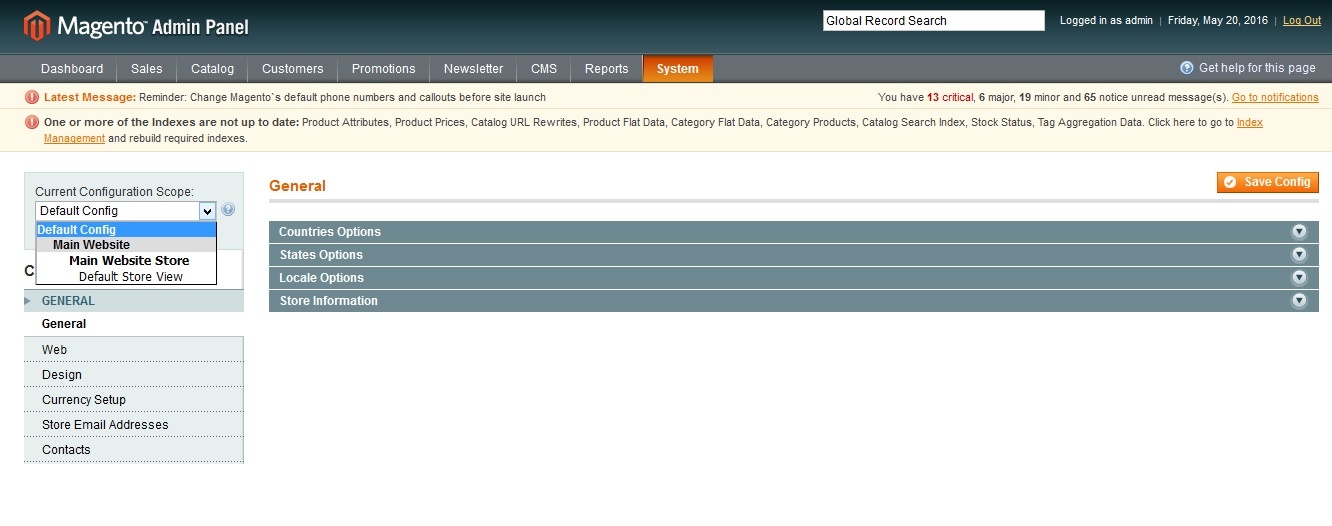
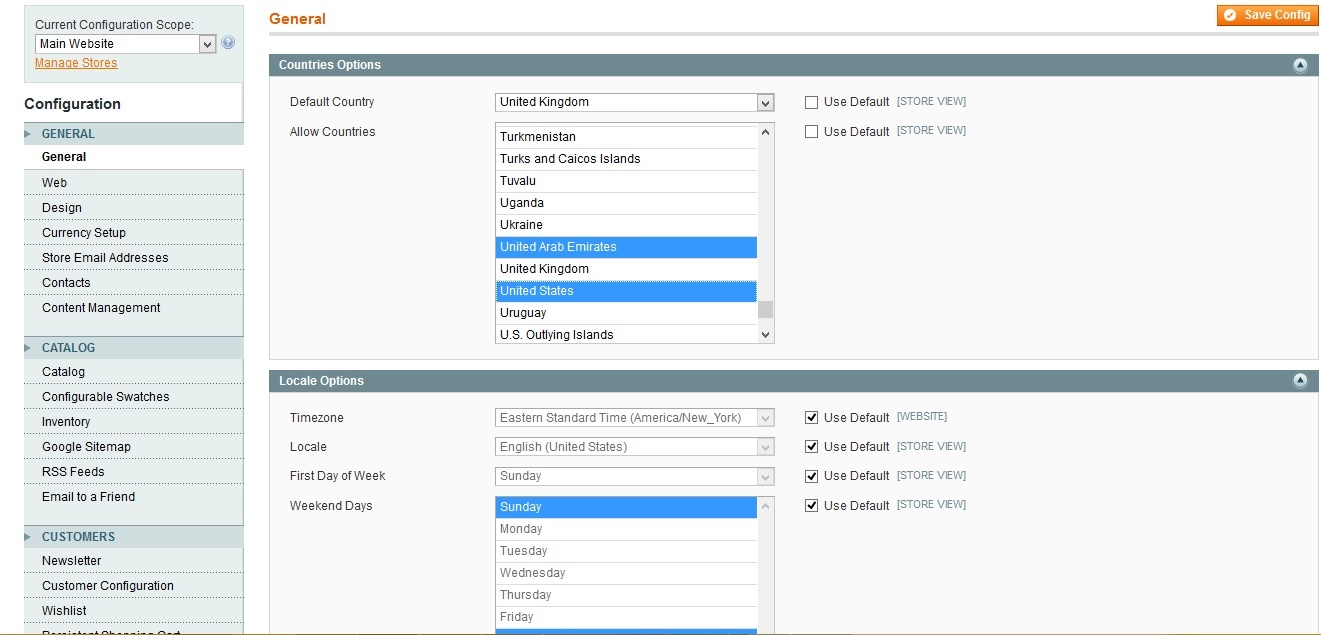
On the left side, you will see a list from which you can choose the scope of the configuration changes you make. The default installation has only the default website and default store options set. Whichever options you choose, it means that the changes you make will be applied to that part only. Let us configure the website section now. First choose the Countries Options.
The ‘Use Default’ option will be checked by default. You will not be able to make any changes unless you uncheck it. I am going to set the Default country as United Kingdom and allow US and UAE also to the list.
I am leaving the Locale options to default, hence the check buttons to the right of default values are not removed. Click on ‘Save Config’ button at the top to save the changes.
Now it’s time to set the Store Information. I am making my own store, hence I unchecked all the default options and entered mine as follows.
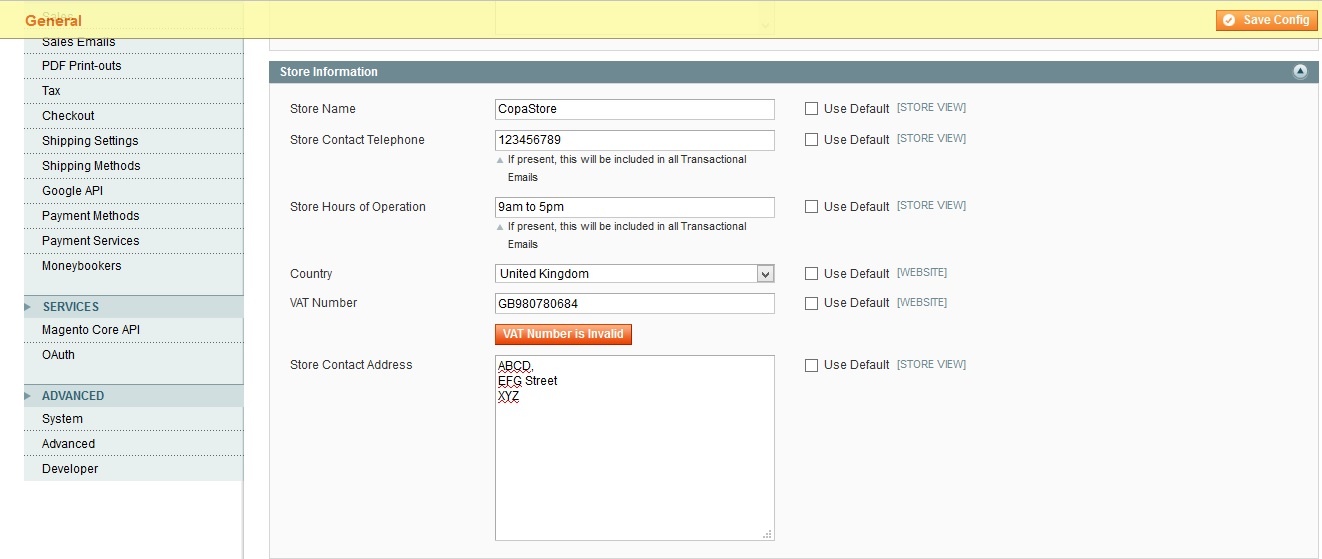
Click on ‘Save Config’ to save the changes. Now under configuration scope, switch to Default Store view and you will see that details you entered there.
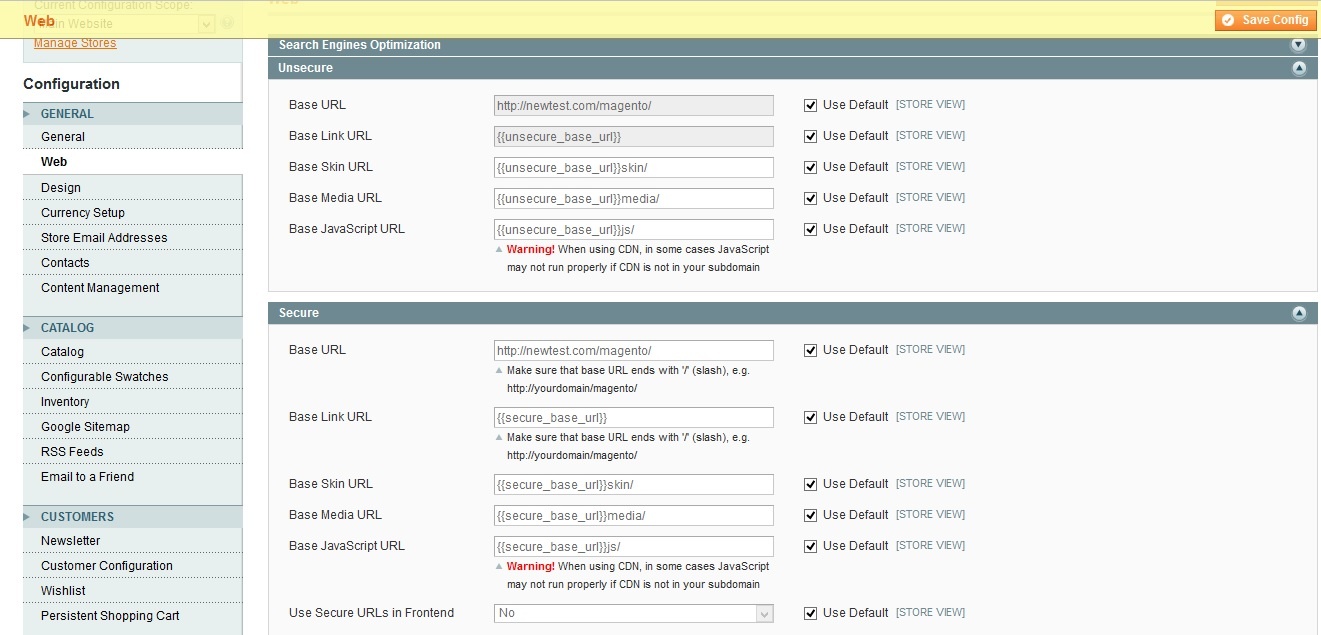
Web Configuration of the magento tutorial
Go to System -> Configuration -> General -> Web and here is where you set the URLs or links related to your magento store. Though there are many options, we will be concentrating on the Unsecure and Secure options only. You may leave the rest as default.
Unsecure – The Base URL where I installed my store is the only data that I need to enter here. In our example, it is http://newtest.com/magento and was already populated under the Base URL section. All the rest of the paths like skin url, media url, javascript url etc are relative to the base URL. Hence you can leave them to default.
Secure – The entries here are same as that of Unsecure except for the last question which asks whether to use secure URLs in front end, which is your store. I want only my admin backend and payment modules to be secure, and I don’t mind if the rest are transmitted without encryption, hence I leave it as ‘No’. If you choose ‘Yes’, remember to install an SSL certificate for your store.
Once the changes are made, remember to click ‘Save Config’ to save the changes.
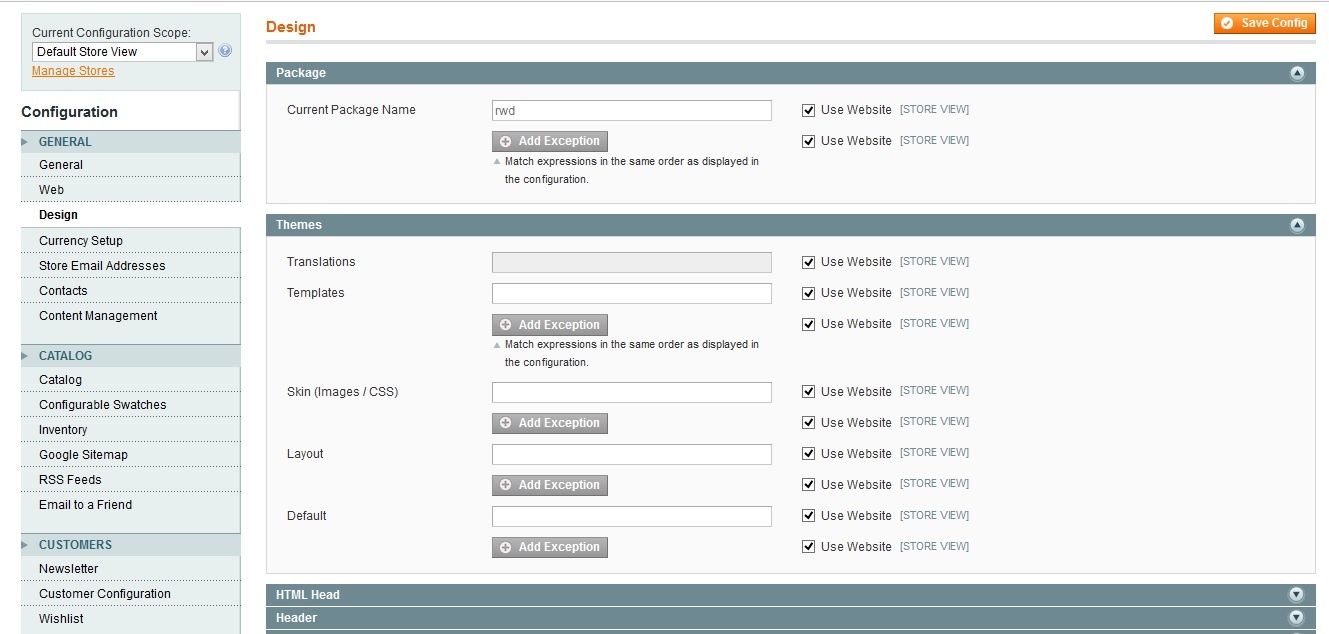
Magento design configuration
This section deals with the default design for your store. You can either choose the default theme or download a theme of your choice from any third party website and upload it here. Details on how to install magento themes are described in detail in another post. For the time being, I leave the settings as default so that the default magento theme will be used.
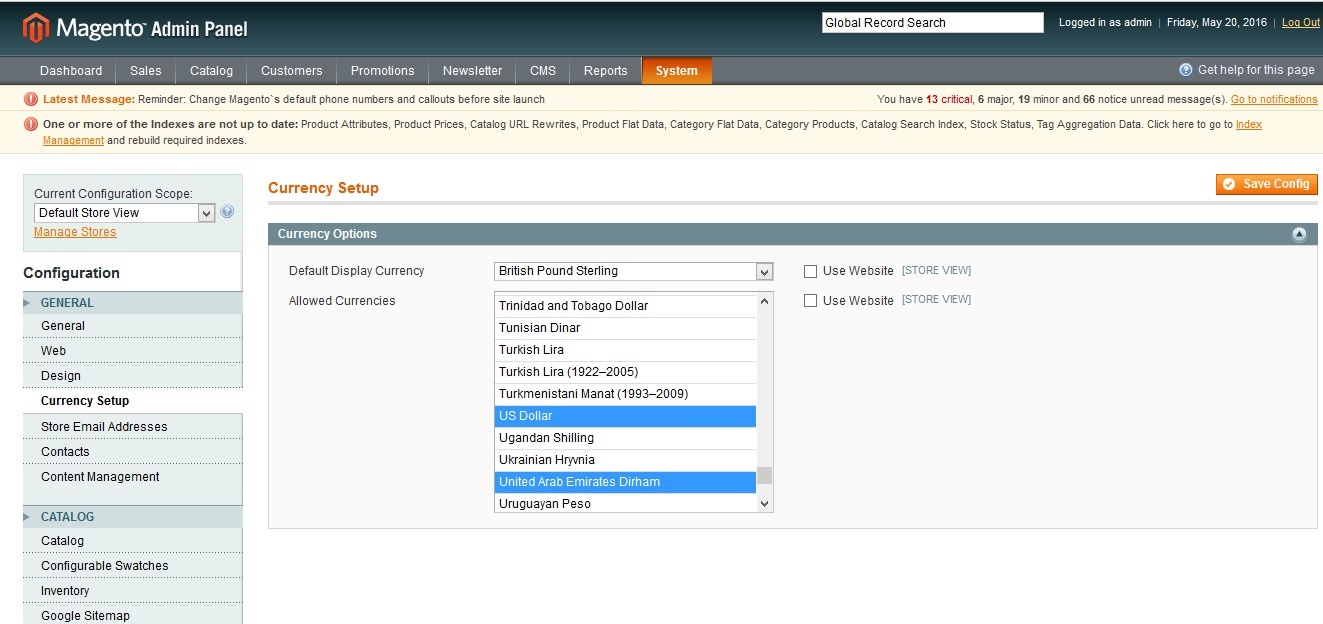
Currency Setup
This section deals with the currencies that your store will accept. I chose the countries as UK, US and UAE , any currency of my like, however I am choosing British Pound Sterling as the default currency. US Dollar and UAE Dirhams can be also choosen as additional allowed currencies. Though you have already chosen Pound as default currency, you need to add it again in the Allowed Currencies section, without which it will fail to save.
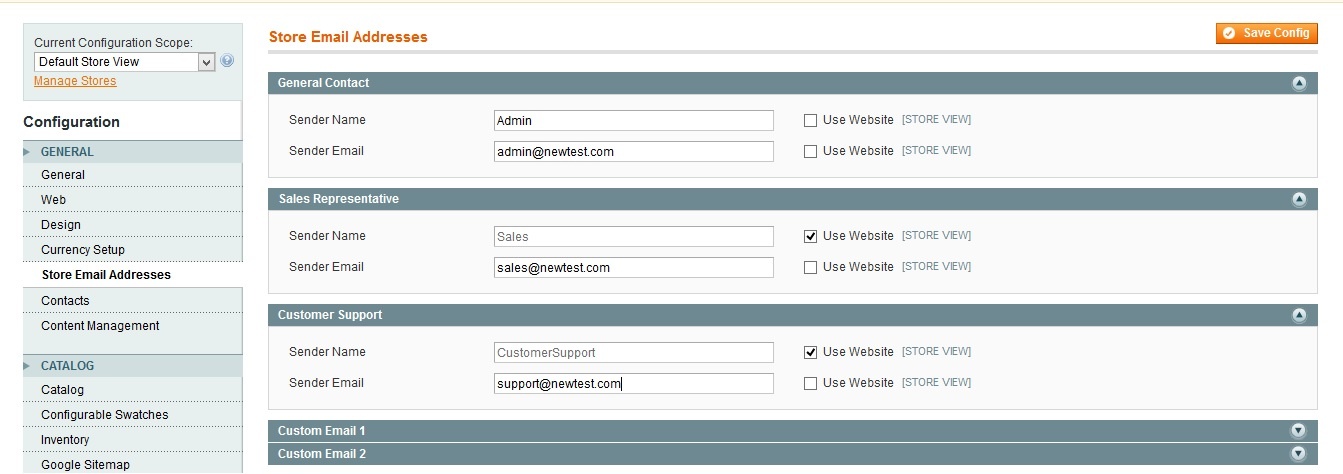
Store Email Addresses
Magento comes with pre-configured roles with access to store. Magento occasionally sends emails to customers regarding order acceptance, payment, password recovery, any other notifications etc. In each of these cases you can choose the from address to be used based on these roles. Magento has a default contact created for General, Sales and Support respectively. If you want any other addresses to add, you can choose the Custom Email Option.
Fill the fields with the desired sender name and corresponding email addresses, click ‘Save Config’ and you are done.
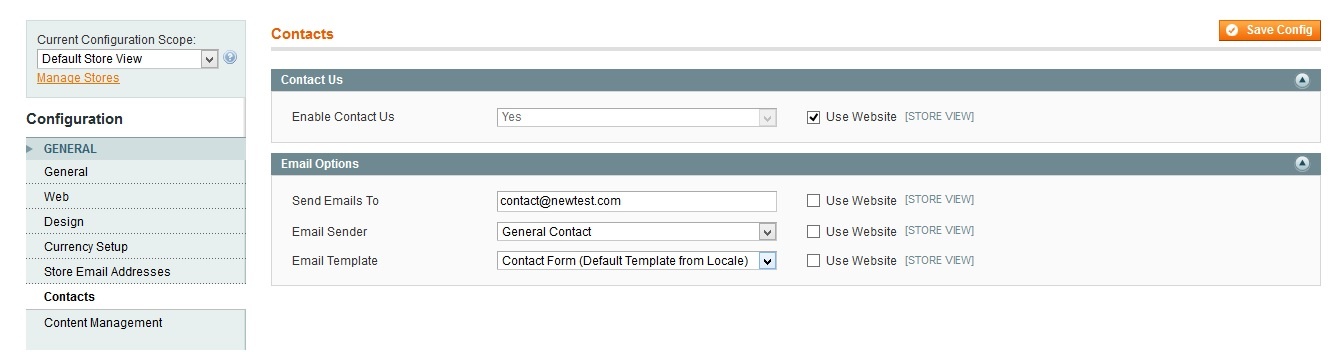
Contacts
This section lets your customers contact you through a contact form on your store. If you do not want the contact form enabled, select ‘No’, otherwise leave the defaulted ‘Yes’. ‘Email Options’ section beneath it determines to which email address the data entered from contact form is to be sent. I have chosen the email address as [email protected]. You can choose the sender based on the contacts you created above and also choose the email template. Since this magento tutorial do not have a custom template now, I chose the default one. Click ‘Save Config’ once you finished.
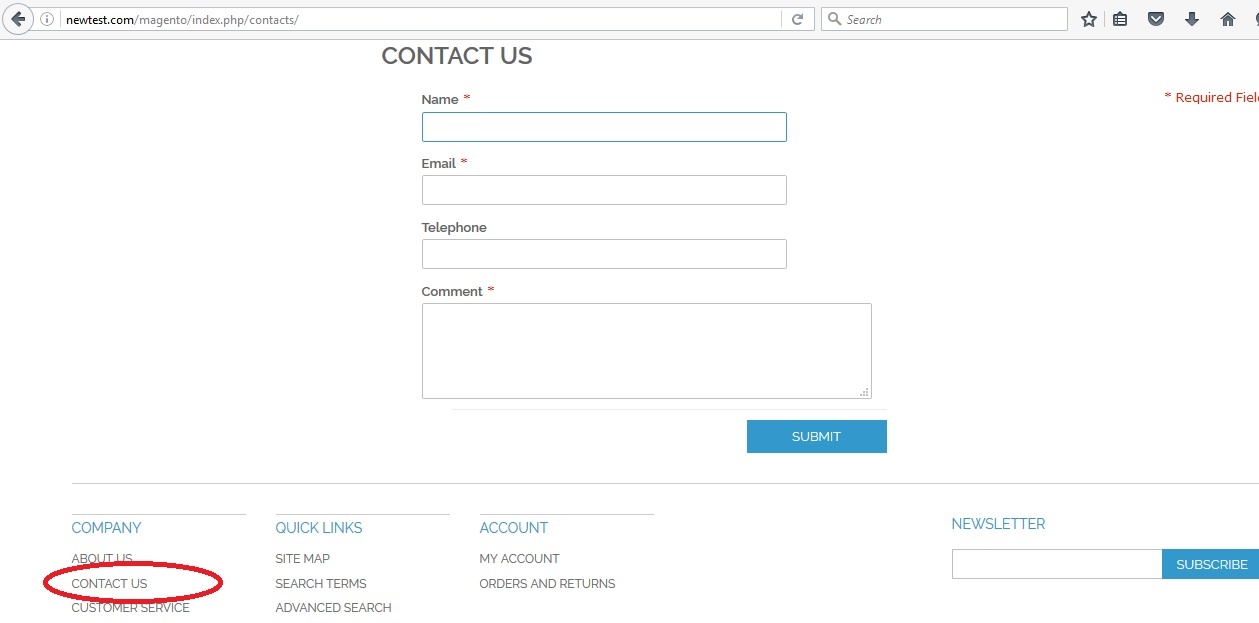
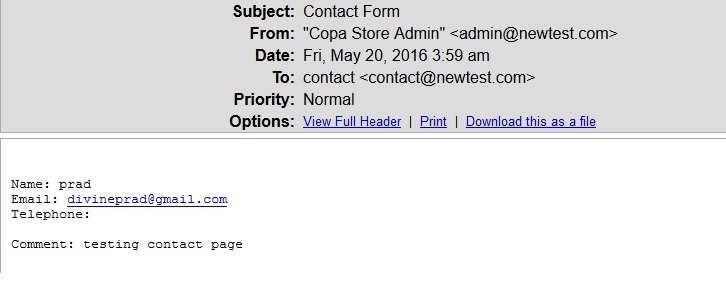
When you access your store front end, you will notice a Contact US page at the bottom of the site as follows.
When the customer fills out that contact form, you will get an email based on how you configured it above. An example is as follows.
Content Management
You can choose the WYSIWYG editor which is default there, unless you plan to use magento as a CMS which will require better editors.
This magento tutorial covered the basic configuration of Magento Admin panel. There are a lot to do in magento further, which will be covered in next posts.
