When it comes to managing your website, having a reliable and user-friendly file management tool is essential. That is where the cPanel file manager comes in. The cPanel file manager is a powerful tool that provides an intuitive interface and robust features for managing the files and folders on your website. Therefore, allowing you to take full control of your website’s content from the control panel of your web hosting account.
In this article, we will cover everything you need to know about this tool. We will start by discussing how to access the file manager dashboard. Then, we will proceed to explore ten things you can do using this powerful tool. Additionally, we will accompany each step of this guide with screenshots so you can follow along easily.
Table of Contents
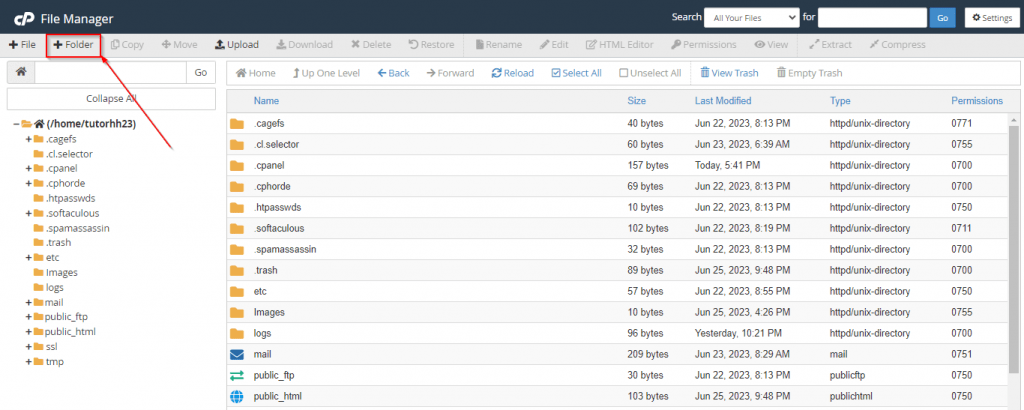
Accessing cPanel File Manager Dashboard
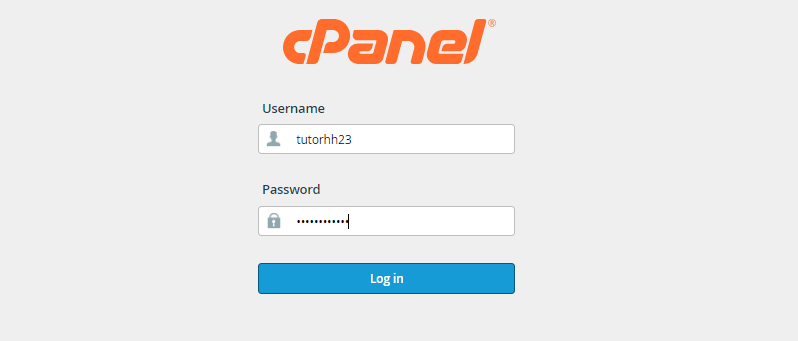
1. Log in to the cPanel account using your username and password.
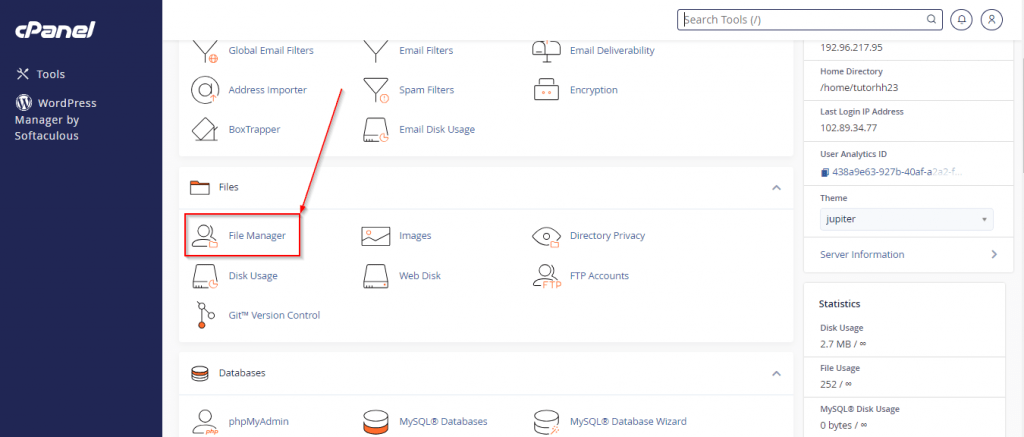
2. Then, navigate to the Files section and click on the File Manager icon.
10 Things You Can Do Using cPanel File Manager
Having discussed how to access the file manager dashboard, let’s proceed to the ten things you can do using this tool.
- Uploading files
- Editing files
- Creating new files
- Creating new folders
- Renaming files
- Copying files
- Moving files
- Deleting files
- Restoring deleted files
- Changing permissions
Uploading Files
With the file manager, you can upload files from your computer to your web server. Whether it’s images, documents, or media files, the intuitive interface allows for smooth drag-and-drop functionality. Here is how to upload files using the file manager:
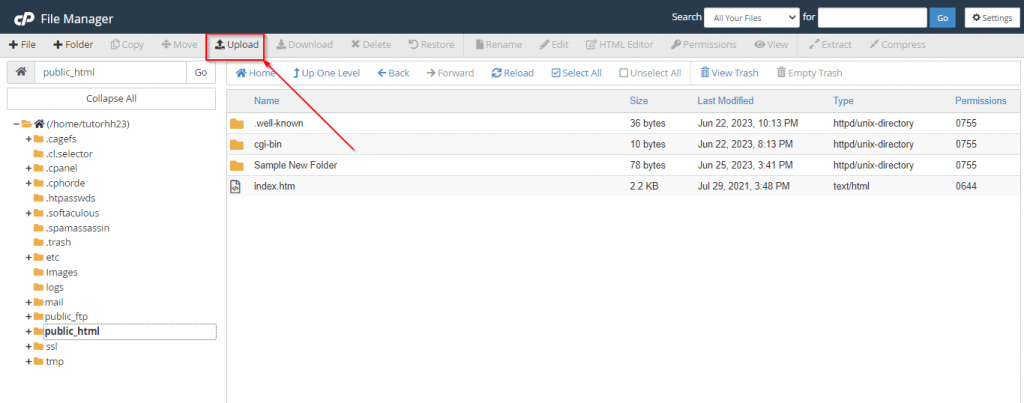
1. From the File Manager dashboard, select the folder where you wish to upload the new file.
2. Next, click on the Upload icon.
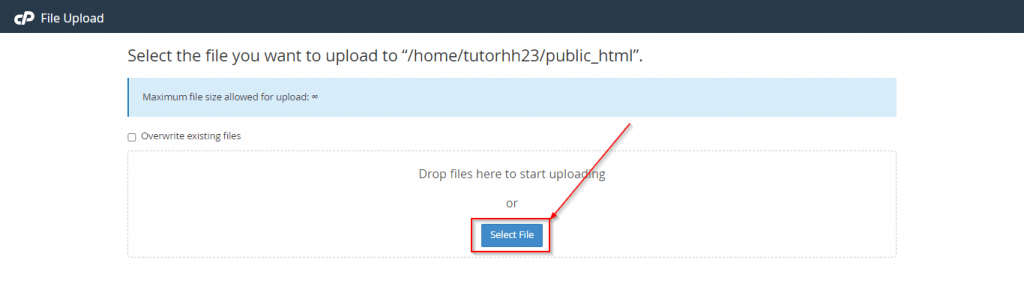
3. Then, click on the Select File button.
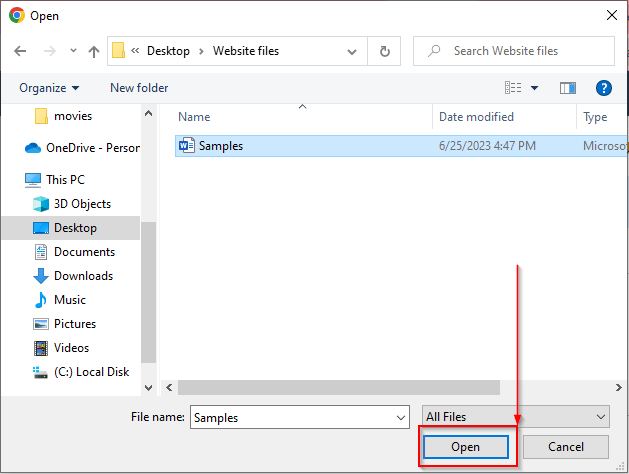
4. Subsequently, select the file from your local computer and click on Open to upload it.
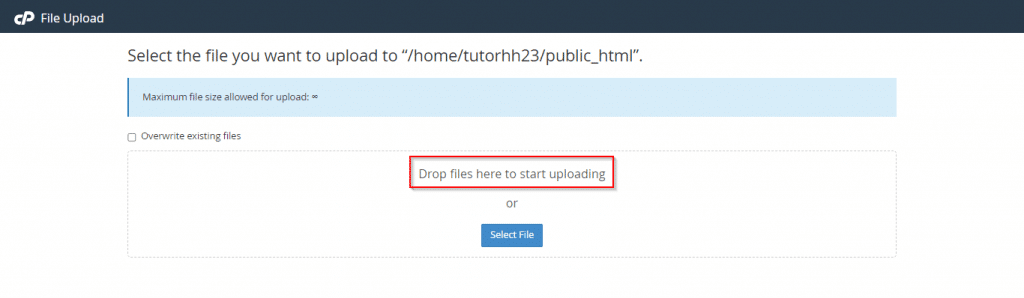
5. Alternatively, drag the file to be uploaded from your local computer and drop it in the region highlighted in the image below.
Editing Files
cPanel file manager makes it easy to modify existing files. Here is how to edit files using the file manager:
1. From the File Manager dashboard, open the folder containing the file you wish to edit and select the file.
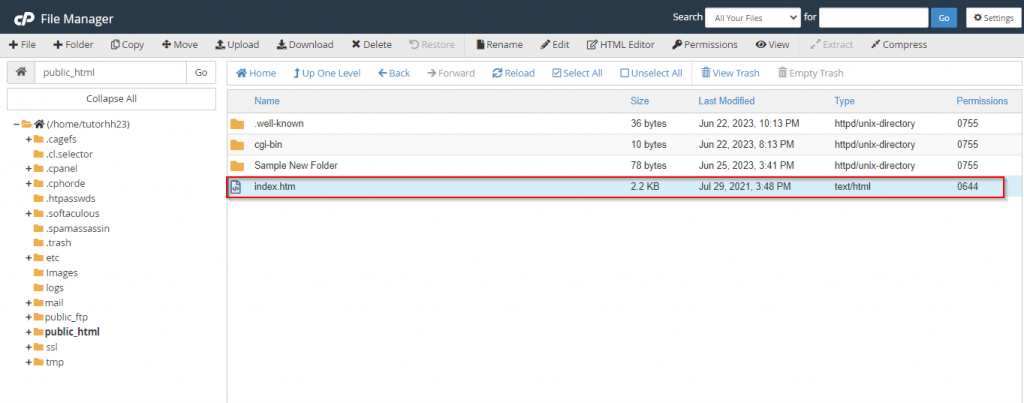
2. Click on the Edit icon.

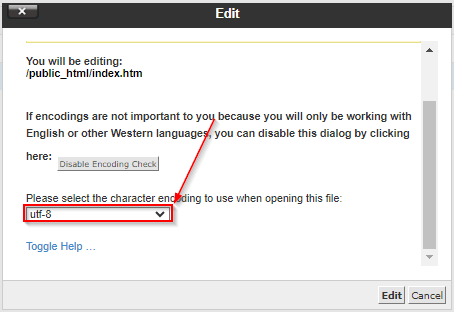
3. Select the character encoding.
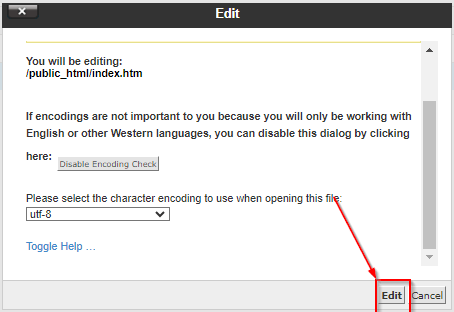
4. Next, click on the Edit button.
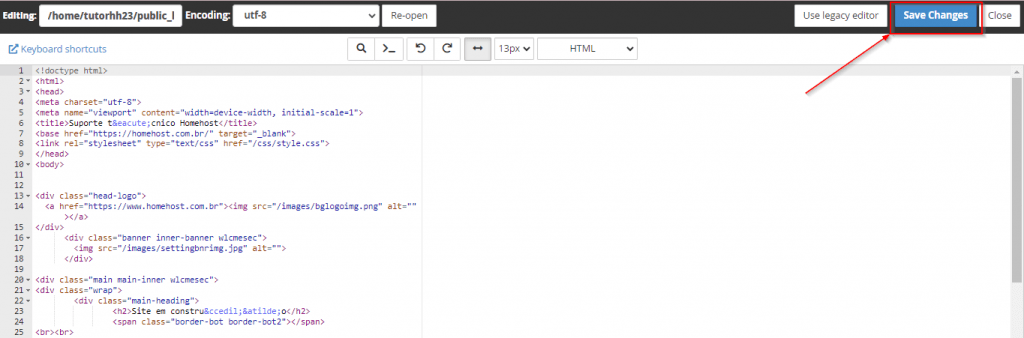
5. Make necessary changes to the file and click on Save Changes.
Creating New Files
The file manager enables you to create new files directly on the server. Whether you need to create a new HTML page, text file, or PHP script, the built-in text editor allows for convenient file creation.
1. From the File Manager dashboard, select the folder where you wish to add the new file.
2. Then, click on the File icon.
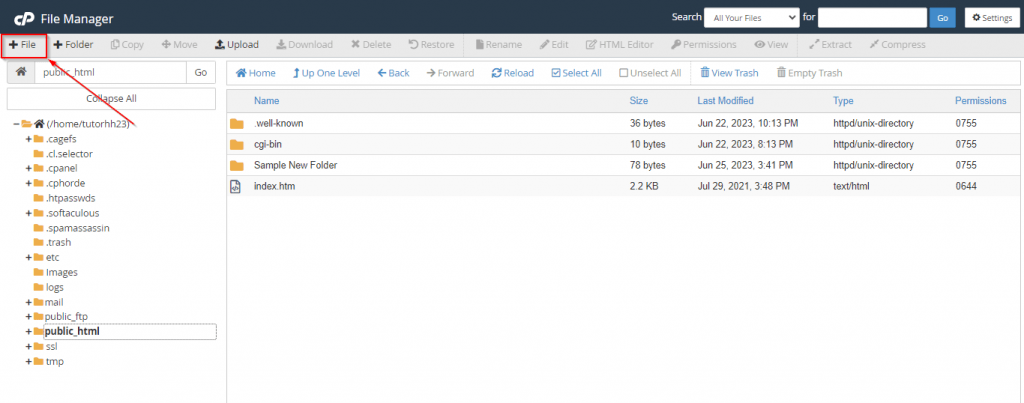
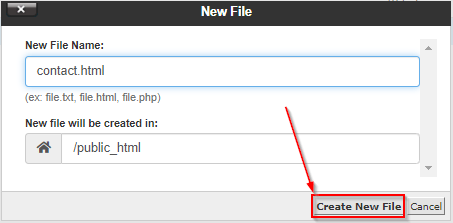
3. From the pop-up box that appears, enter the name of the file you wish to create.
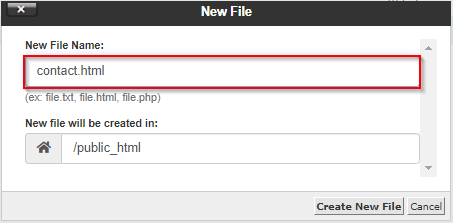
4. Finally, click on Create New File.
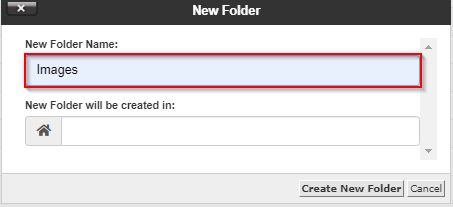
Creating New Folders
Folders help to structure and organize files. With cPanel file manager, you can create new folders seamlessly. Here is how to do that:
1. From the File Manager dashboard, select the parent folder where you wish to add a new folder.
2. Then, click on the Folder icon.
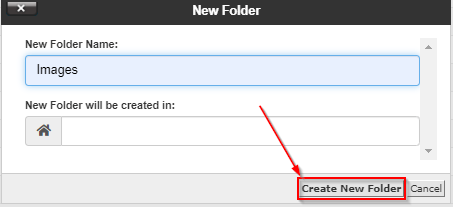
3. From the pop-up box that appears, enter the name of the folder you wish to create.
4. Finally, click on Create New Folder.
Renaming Files Using cPanel File Manager
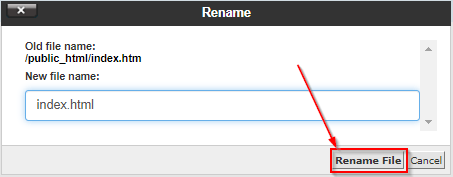
With the cPanel file manager, you can change the name of your files and folders as you deem fit. Here is how to rename your files or folders using the file manager:
1. From the File Manager dashboard, select the file you wish to rename.
2. Click on the Rename icon.

3. Update the file name.

4. Click, Rename File.
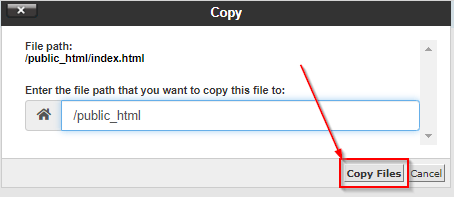
Copying Files Using cPanel File Manager
If you wish to keep a copy of your file(s) elsewhere using the file manager, here is how to do that:
1. From the File Manager dashboard, open the folder containing the file(s) you wish to copy and select the file(s).
2. Click on the Copy icon.
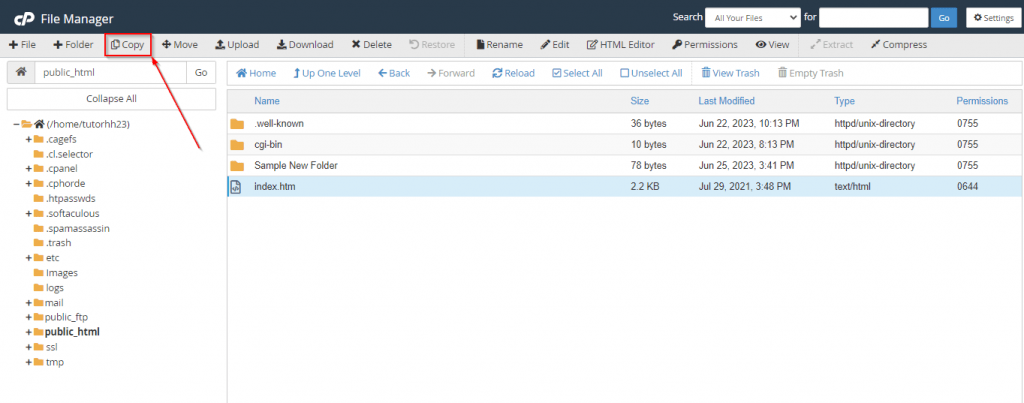
3. Enter the file path that you wish to copy the file to.
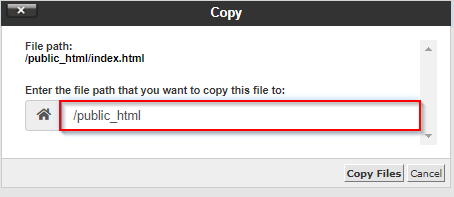
4. Then, click on Copy Files.
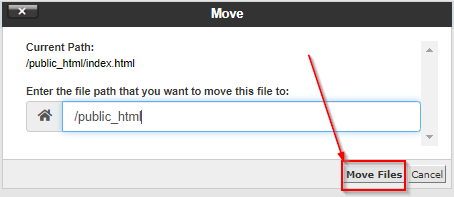
Moving Files
You can move your files from one folder to another using the file manager. Here is how to do that:
1. From the File Manager dashboard, open the folder containing the file(s) you wish to move and select the file(s).
2. Click on the Move icon.

3. Enter the file path you wish to move the file to.
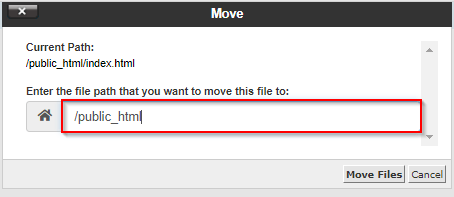
4. Finally, click on Move Files.
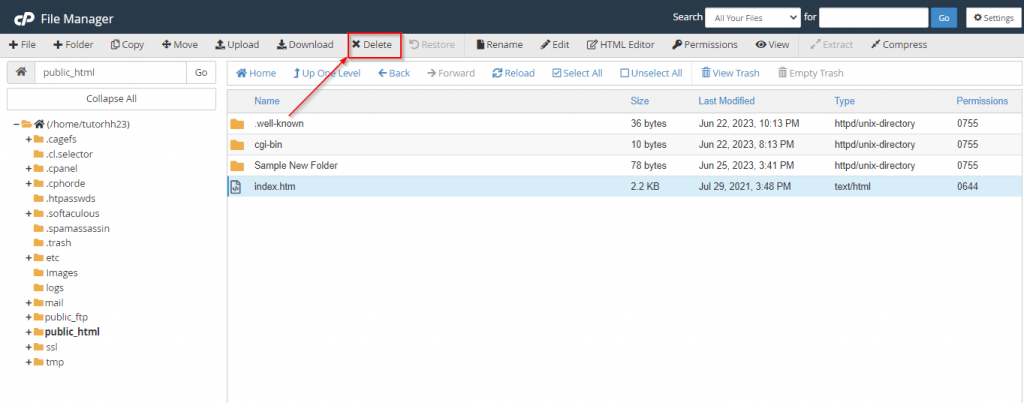
Deleting Files
Deleting files that are no longer needed will help increase the efficiency of your website. Here is how to delete files using the file manager.
1. From the File Manager dashboard, open the folder containing the file you wish to delete and select the file.
2. Click on the Delete icon.
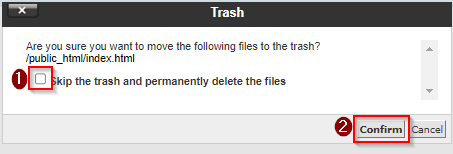
3. Finally, click on the Confirm button to move all selected files to the trash folder.
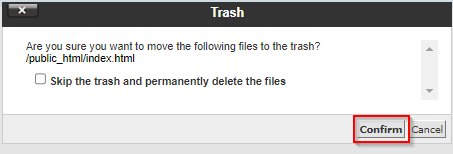
4. However, if you wish to delete the file(s) permanently, check the Skip the trash and permanently delete the files box then, click the Confirm button.
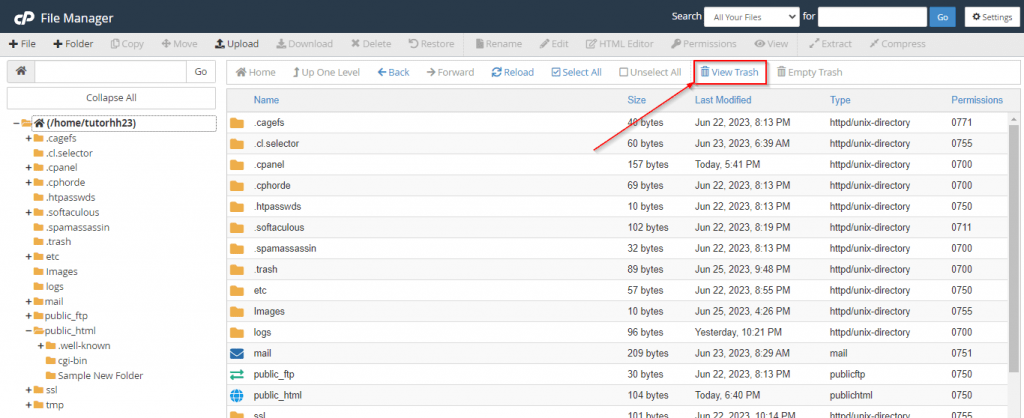
Restoring Files
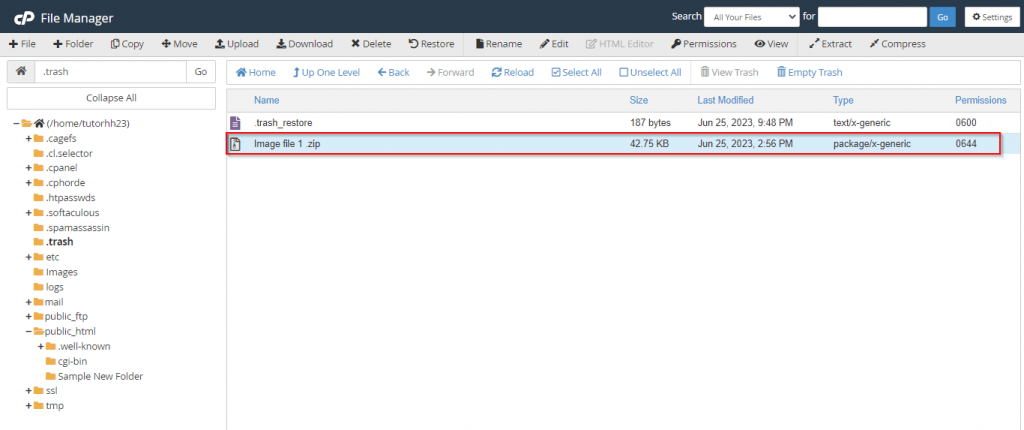
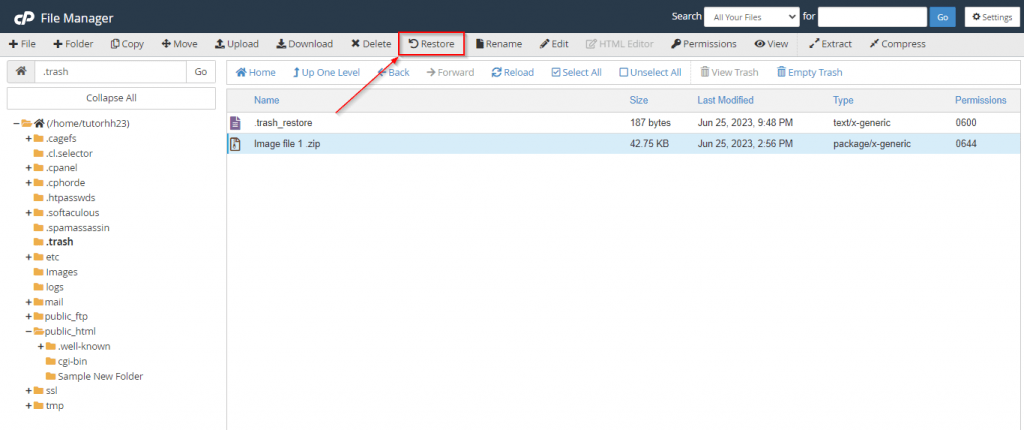
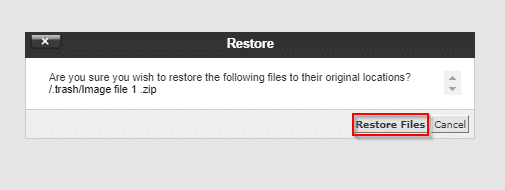
In cases of accidental file deletion, the file manager makes it possible to restore lost files. Here is how to use it:
1. From the File Manager dashboard, click on View Trash.
2. Select the file(s) you wish to restore.
3. Click on the Restore icon.
4. Finally, click on Restore Files.
Changing Files’ Permission Using cPanel File Manager
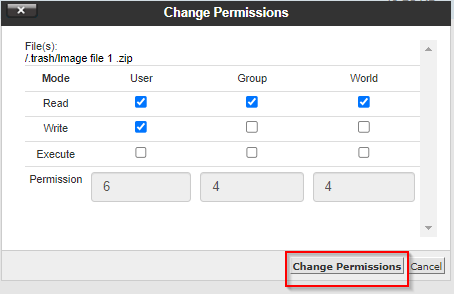
File permissions dictate who can access and manipulate specific files on your website. This feature is particularly important for enhancing the security and integrity of your website’s files. Using the file manager, you can easily modify file permissions to control user access. Here is how to use it:
1. From the File Manager dashboard, select the folder or file that you wish to change permission for.
2. Click on the Permissions icon.
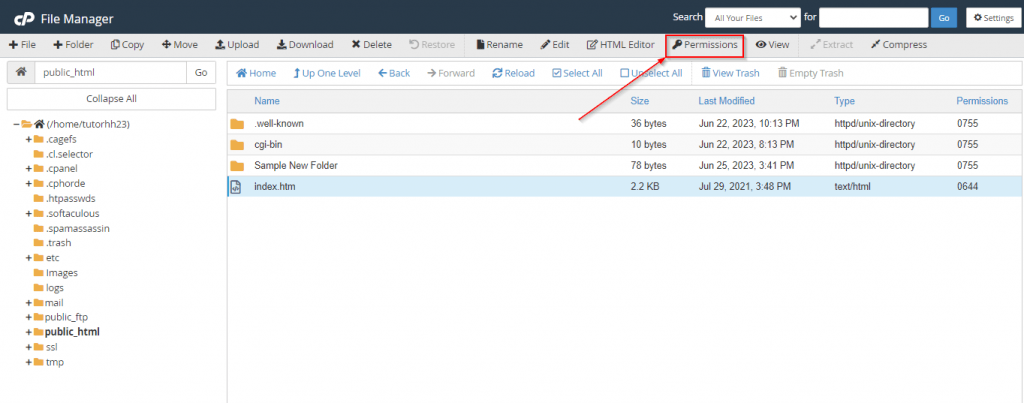
3. Set the parameters as needed and click on Change Permissions.