Databases are an important part of any website or software. With relatively large amount of data, all applications use one or the other database method to store data. PostgreSQL, commonly known as Postgres is an open source, object – relational database management system (RDBMS). It was originally designed for unix platforms, however it has been modified to run on all platforms now. Install PostgreSQL in Ubuntu takes less than 5 minutes.
This article explains how PostgreSQL can be installed and configured in an Ubuntu 14.04 dedicated server, or even a vps server. The post is intended to help newbies who are starting with postgresql.
Install PostgreSQL in Ubuntu 14
Like any other OS, Ubuntu has its own package manager called apt, which helps in installing and updating any software in their repository. Before starting with any installation, it is always a good practice to make sure that the packages available are up-to-date. Assuming I have the root login, issue the following command to get updated packages.
root@teste3:~# apt-get -y update
Now that the packages are updated, the installation is just a step away.
root@teste3:~# apt-get -y install postgresql postgresql-contrib
The process of install PostgreSQL should complete without errors, and once the process of install PostgreSQL in ubuntu is done, you are ready to start using PostgreSQL. The installation by default creates a system user called postgres, which has default PostgreSQL roles. In Postgres, database access permissions are managed by roles. A role may include a single user or multiple users and it specifies the privileges for these users based on how the role is setup. We will come into creating roles later in this post, meanwhile let us see how to get to the postgresql prompt.
Gaining Access via command line
As mentioned, postgres is a system user with default postgresql role. We need to switch to that system user first to be able to connect to the postgres terminal.
root@teste3:~# sudo -i -u postgres

postgres@teste3:~$
Now we are logged in as postgres user. Now from this terminal issue the psql command and we will straight be taken to the psql prompt where we can manage the databases.
postgres@teste3:~$  psql
psql (9.3.12)
Type "help" for help.

postgres=#
To quit from the psql prompt, you use \q as follows. It will log you out of the psql prompt and return to the postgres user shell.
postgres=# \q
postgres@teste3:~$
Creating Roles
Roles, as mentioned above, is the postgresql concept which manages the database access permission. A new role can be created easily from the command line after you install PostgreSQL in ubuntu or from the psql prompt as follows. For the first method, you need to quit from the psql prompt and return to the postgres user shell. You can create a role as shown below with the command createuser. It will ask you a few questions, on answering which the new role will be created.
postgres@teste3:~$ createuser --interactive
Enter name of role to add: prad
Shall the new role be a superuser? (y/n) n
Shall the new role be allowed to create databases? (y/n) y
Shall the new role be allowed to create more new roles? (y/n) n
Roles can also be created from the psql prompt as follows.
postgres=# create role prad1;
CREATE ROLE
This will simply create a role named prad1 with no privileges, not even login privilege. There are various options available in the command prompt using which privileges can be assigned while creating a role or later. Another option which creates roles automatically with login privilege is create user.
postgres=# create user prad2;
Listing Roles
All roles in psql can be seen by typing the command \du
postgres=# \du


List of roles
Role name |                   Attributes                   | Member of
-----------+------------------------------------------------+-----------
postgres  | Superuser, Create role, Create DB, Replication | {}
prad      | Create DB                                      | {}
prad1     | Cannot login                                   | {}
prad2     |                                                | {}
The above output shows four roles
1) The default postgres role with all permissions
2) The role prad which we created from postgres user shell using “createuser” command, with permission to create db
3) The role prad1 which we created from postgres prompt using “create role” command with no login privilege
4) The role prad2 which we created from postgres prompt using “create user” command which has login privilege enabled by default
To remove a user or role created above, you can use the drop command.
postgres=# drop user prad1;
Just like mysql, please note than any commands executed in the psql prompt should have a semicolon at the end. Unlike mysql, psql will not throw any error if you missed the semicolon, but the command will not be executed.
Creating, Viewing and Deleting PostgreSQL Databases
Like roles, databases also can be created in 2 ways
a) Directly from the postgres user shell using createdb command
postgres@teste3:~$ createdb test2
b) From the psql prompt using create database command
postgres=# create database testdb;
c) To view the databases created, issue the following command.
postgres=# \l
List of databases
Name    |  Owner   | Encoding |   Collate   |    Ctype    |   Access privileges
-----------+----------+----------+-------------+-------------+-----------------------
testdb | postgres | UTF8     | en_US.UTF-8 | en_US.UTF-8 |
postgres  | postgres | UTF8     | en_US.UTF-8 | en_US.UTF-8 |
template0 | postgres | UTF8     | en_US.UTF-8 | en_US.UTF-8 | =c/postgres          +
|          |          |             |             | postgres=CTc/postgres
template1 | postgres | UTF8     | en_US.UTF-8 | en_US.UTF-8 | =c/postgres          +
|          |          |             |             | postgres=CTc/postgres
test2     | postgres | UTF8     | en_US.UTF-8 | en_US.UTF-8 |
(5 rows)
Assigning a user to a database
We have created a user ‘prad’ and database ‘testdb’ above. Now, we will see how to assign the user ‘prad’ to the database ‘testdb’. First, we need to set a password for the user and then grant privileges for the database to the user as follows.
postgres=# alter user prad with encrypted password 'prad';
ALTER ROLE

postgres=# grant all privileges on database testdb to prad;
GRANT
Connecting to the Database
The database connection can be tested via command line interface as follows. We have the database ‘testdb’ with user ‘prad’ with password ‘prad’
root@teste3:~# psql -U prad -d testdb
Password for user prad:
psql (9.3.12)
Type "help" for help.

testdb=>
If you are connecting to a remote database in a remote server, in addition to the above you need to specify the hostname and port as well. The port used my postgresql is 5432 by default. Suppose I am connecting to the remote database testdb on server 1.2.3.4 using username prad. The password for user prad is also ‘prad’. We will connect as follows
root@teste3:~# psql -h 1.2.3.4 -p 5432 -U prad -W prad -d testdb

where -h is for host,
-p is for port
-U is for username
-W is for password
-d for database
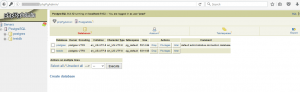
If you want to connect via a graphical interface, there are various options available both web based and software like postgresql studio , phppgadmin , postgresql management studio etc
Creating, Updating and Deleting PostgreSQL Tables
The table creation, data insertion, select statements, deletion etc are pretty much the same as that in mysql. For example, below I am creating a table named test_table. It has three columns namely id, name and age. The field id will contain integer values, name will contain characters and age again will hold integer values. Postgresql allows a lot of data types which can be found here. Given below is an example on how the table can be created, how data can be inserted into it, how the inserted data can be viewed and how the table can be deleted.
root@teste3:~# psql -U prad -d testdb
Password for user prad:
psql (9.3.12)
Type "help" for help.

testdb=> create table test_table (id int primary key, name varchar (50) not null, age int not null);
CREATE TABLE

testdb=> insert into test_table(id, name, age) values (1,'prad',30);
INSERT 0 1

testdb=> select * from test_table;
id | name | age
----+------+-----
1 | prad |  30
(1 row)

testdb=> drop table test_table;
DROP TABLE

The table details can be found by executing \d with table name on the psql prompt. For example,

testdb=> \d test_table
Table "public.test_table"
Column |         Type          | Modifiers
--------+-----------------------+-----------
id     | integer               | not null
name   | character varying(50) | not null
age    | integer               | not null
Indexes:
"test_table_pkey" PRIMARY KEY, btree (id)
