Nano is an easy-to-use text editor designed for the command line environment for Linux systems. Compared to alternatives such as Vi or Emacs, it is a beginner-friendly text editor. Nano comes pre-installed on many Linux distributions. However, if your system don’t have it, this article will guide you through the process of installing Nano on your Linux machine.
Installing Nano
The process is straightforward. However, how you install Nano depends on the Linux distribution you are using, as each distribution has a different default package manager (e.g. APT for ubuntu, DNF for Fedora). In this guide, we will cover the installation steps for two popular Linux distributions: Ubuntu and Fedora.
Before beginning, note that installing packages on Linux requires administrative privileges, so you must enter your password when prompted.
Ubuntu
Ubuntu use the Advanced Packaging Tool (APT) for package management. To install Nano on Ubuntu, firstly run the following command to update system packages:
sudo apt updateOnce the system packages are up to date, install Nano by running the following command:
sudo apt install nanoFedora
To install Nano on Fedora, you can use the default package manager DNF. Here’s how you can install Nano:
Firstly, update the system packages:
sudo dnf updateThen, run the following command to install nano on fedora
sudo dnf install nanoUsing Nano
After you install nano, you can start using it to edit text files. It provides basic editing capabilities such as creating, modifying and saving text files. In this section you can find basic commands to help you get started:
Opening A File
To open a file with Nano, you can simply type the following command in the terminal:
nano <filename>Code language: HTML, XML (xml)You should replace the filename with the actual name of the file you want to open. If the file exists, Nano will open it in the editor window. If the file does not exist, Nano will create a new file with the specified name. When you open a file, you will see a window as shown in the image below.
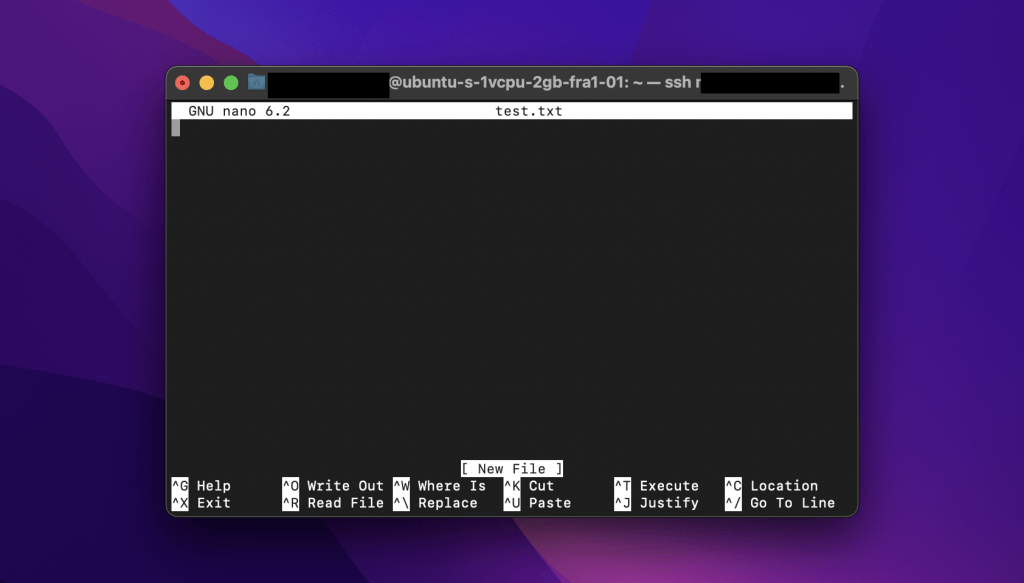
As you may have noticed, some commands and their shortcuts are placed at the bottom of the window. You can use these shortcuts to perform file-related operations. The ^ character represents the CTRL key, so you can combine it with some letters to edit file.
Editing File
Nano allows to move the cursor with the arrow keys on the keyboard. You can write text, delete or update an existing text by placing the cursor at the point you want to edit. In addition, Nano supports basic text editing features such as copy, cut and paste. For example:
- To make a selection within the text, you can use the
ALT + Akeys to place a mark at the beginning of the text, then move the cursor to expand the selection. - After selecting part of the text,
ALT + 6will copy the selected text to the buffer, whileCTRL + Kwill cut it. - After copying or cutting the text, you can paste it wherever you want by using
CTRL + Ukeys.
Saving and Exiting
To save the changes you made to the file, you can use the keyboard shortcut Ctrl + O. Then, nano will prompt you to confirm the filename. Press Enter to save the changes and overwrite the existing file or provide a new filename to save as a different file.
To exit Nano, you can use the keyboard shortcut Ctrl + X. If you have unsaved changes, Nano will prompt you to save them before exiting. Press Y to save the changes or N to exit without saving.
Conclusion
Nano is a really user-friendly command line text editor. In this guide, we discovered how to install nano on linux and do basic editing like opening files, copying, pasting text with keyboard shortcuts. Working with shortcuts may seem difficult at the beginning, but it will get easier after some practice.
Thank you for reading.