How to grant MySQL remote access: in Linux and Windows
Firstly, by default MySQL is installed only listening to localhost. It’s closed so that it won’t listen to your public IPs externally. This tutorial works both for Ubuntu, Debian and CentOS. To grant mysql remote access, we need to first of all open the MySQL to listen to external connections, and then, enable the user for remote networks. It’s very easy and simple to allow remote connections in MySQL
Step 1 – Allow remote connections to the MySQL server
Before grant mysql remote access, it’s necessary to open the server port 3306.
First, we will update our system and install Nmap. This utility shows the currently opened ports in the server. In this article, we will show how to allow remote connections both in centos, ubuntu and windows.
Linux Ubuntu/Debian:
sudo apt-get update
sudo apt-get install nmap
In CentOS:
yum -y install nmap
Now we will run nmap to make sure mysql isn’t listening in our public IP. Make sure to replace [server-ip] with your public server IP.
nmap [server-ip]
The output should be something like:
Starting Nmap 6.40 ( http://nmap.org ) at 2016-05-02 18:50 BST
Nmap scan report for teste2.copahost.com (177.85.98.201)
Host is up (0.0000090s latency).
Not shown: 998 closed ports
PORT STATE SERVICE
22/tcp open ssh
80/tcp open http

Nmap done: 1 IP address (1 host up) scanned in 2.40 seconds
As we can see, there is no server daemon opened on port 3306, and we need to configure MySQL to listen in our public IP.
Let’s edit our my.cnf file
pico /etc/mysql/my.cnf
Now you must find this line:
bind-address = 127.0.0.1
And replace with:
bind-address = 0.0.0.0
Also, make sure this line is commented (with a # in the beginning):
# skip-networking
This will tell MySQL to listen in both localhost (127.0.0.1) and in the public IP of the server.
After finishing, type CTRL+X to exit, and Y to save.
Now you must restart the MySQL server. This restart process may be different according to your Linux distro.
Debian 7 and older
 /etc/init.d/mysqld stop
 /etc/init.d/mysqld start
Ubuntu 14 and newer
sudo stop mysql
sudo start mysql
CentOS 6.x and older:
service mysqld stop
service mysqld start
CentOS 7.x and Debian 8:
systemctl mysqld stop
systemctl mysqld start
Let’s run nmap again to confirm if the port 3306 is opened in the public IP:
# nmap 177.85.98.201

Starting Nmap 6.40 ( http://nmap.org ) at 2016-05-02 19:01 BST
Nmap scan report for teste2.copahost.com (177.85.98.201)
Host is up (0.000011s latency).
Not shown: 997 closed ports
PORT STATE SERVICE
22/tcp open ssh
80/tcp open http
3306/tcp open mysql

Nmap done: 1 IP address (1 host up) scanned in 2.39 seconds
We can see 3306/tcp open mysql, which means that the MySQL port is opened and waiting for connections.
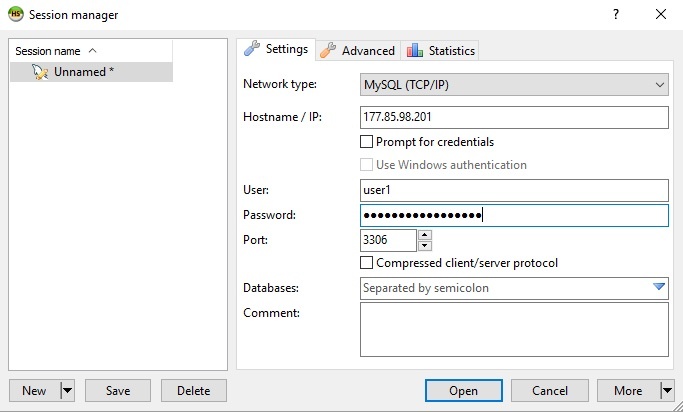
To test, we will use HeidiQSL, which is a freeware Windows MySQL client, and we will try to connect to our server:
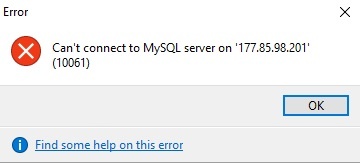
We will get an error message because we haven’t granted the privileges to the user to access remotely yet.
Step 2 – Grant remote access to MySQL users
To solve this issue, we must grant the remote access privileges to our myqsl user. So you must open connect to mysql locally:
mysql -u root -p
Now we will grant the privileges using the command “GRANT ALL PRIVILEGES”. Please note that even if the username is already configured for the localhost access, we will have to set a new password for it to connect remotely. You must replace [username] and [new-password] in this command.
GRANT ALL PRIVILEGES ON *.* TO '[user-name]'@'%'
IDENTIFIED BY '[new-password]';
FLUSH PRIVILEGES;
This command will ensure all the IP addresses can connect to the server using this username and password. We will explain how to limit and restrict access to certain IPs or networks.
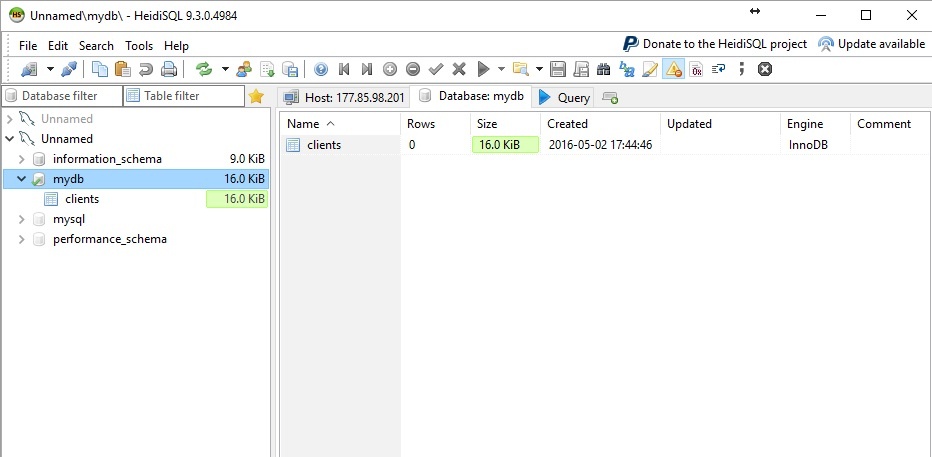
Now you should be able to connect to the remote MySQL server using the configured username and password.
Grant remote access to specific IPs or networks
To restrict the IP or network, you should replace the % (wildcard) with the IP or block.
Examples:
This will only allow connections from the IP 177.85.98.15
GRANT ALL PRIVILEGES ON *.* TO '[user-name]'@'177.85.98.15'
IDENTIFIED BY '[new-password]';
FLUSH PRIVILEGES;
This will allow connections from the IP range 177.85.98.1 to 177.85.98.254
GRANT ALL PRIVILEGES ON *.* TO '[user-name]'@'177.85.98.%'
IDENTIFIED BY '[new-password]';
FLUSH PRIVILEGES;
Now, this example grant mysql remote access to any hostname ending in *.myprovider.com
GRANT ALL PRIVILEGES ON *.* TO '[user-name]'@'%.myprovider.com'
IDENTIFIED BY '[new-password]';
FLUSH PRIVILEGES;
To allow access from any network, without restriction, you should keep only the % (wildcard). This will grant mysql remote access to any IP or network.
GRANT ALL PRIVILEGES ON *.* TO '[user-name]'@'%'
IDENTIFIED BY '[new-password]';
FLUSH PRIVILEGES;
Grant mysql remote access to specific MySQL databases and tables
To restrict the access to a specific database or table, you should replace the *.* with: [database].[table]
This allows access only to the mydb database, with any table:
GRANT ALL PRIVILEGES ON mydb.* TO '[user-name]'@'%'
IDENTIFIED BY '[new-password]';
FLUSH PRIVILEGES;
This command grants access only to the table clients, inside the mydb database:
GRANT ALL PRIVILEGES ON mydb.clients TO '[user-name]'@'%'
IDENTIFIED BY '[new-password]';
FLUSH PRIVILEGES;
If you need to grant access specifically to more than one table, then you should run the command more than once:
GRANT ALL PRIVILEGES ON mydb.table1 TO '[user-name]'@'%'
IDENTIFIED BY '[new-password]';
GRANT ALL PRIVILEGES ON mydb.table2 TO '[user-name]'@'%'
IDENTIFIED BY '[new-password]';
GRANT ALL PRIVILEGES ON mydb.table3 TO '[user-name]'@'%'
IDENTIFIED BY '[new-password]';
FLUSH PRIVILEGES;
Grant option
You can also allow such user to be able to delegate and grant privileges to other users, by adding WITH GRANT OPTION to the end of the command.
It would look like:
GRANT ALL PRIVILEGES ON *.* TO '[user-name]'@'%'
IDENTIFIED BY '[new-password]'
WITH GRANT OPTION;
FLUSH PRIVILEGES;
If you need to recover the mysql user password, you can also read this article.
Conclusion
It’s simple to allow MySQL remote connections to a database. But be warned that you need to specify the desired hostname or IPs that have access to it. Also, it’s important to allow such connections in port 3306 in your firewall.